
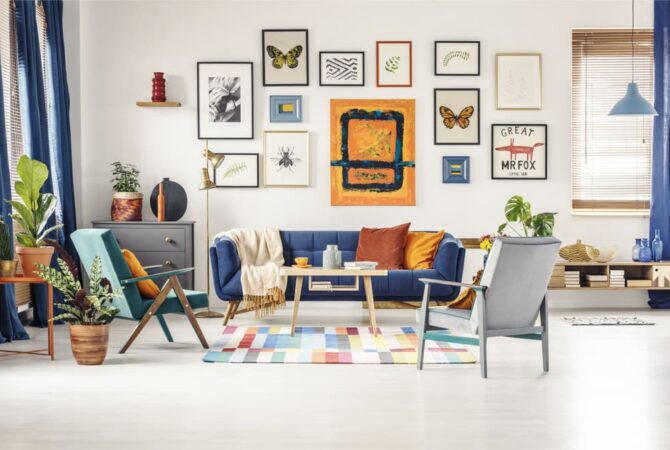
Creating a wall gallery is a great way to add personality to a room while creating visual interest in a single focal point composed of multiple pieces. From picking a theme to hanging up artwork, read our gallery wall guide below!
Grab Your Supplies
Before you start planning a gallery wall layout and picking out photos, make sure you have everything you need for the project. Besides your artwork or photos and any frames you’ll use, you should make sure you have these supplies on hand:
- Hammer
- Nails for specific frames or adhesive hanging strips
- Level
- Ruler or measuring tape
- Pencil with an eraser for marking the wall
- Pieces of paper & scissors to map out your design
- Painter’s tape
- Stud finder
Find the Best Spot
Choosing a location is the first step in designing a gallery wall! Make an entire accent wall of gallery-style pieces, span it across an entire wall, or tuck the gallery wall into a corner—don’t be afraid to take up space! Just try to avoid direct sunlight and high-traffic areas when deciding where to hang art on the wall, as sunlight and movement can damage art over time.
Decide on a Gallery Wall Theme
When you first start building a gallery wall design, begin by solidifying a theme, such as a color, aesthetic, shape, or other feature found in each piece of the gallery. This will help make it easier to gather pieces that work well together as a cohesive unit. For example, complete a dark academia gallery wall theme with gold frames, dark colors, and dried botanicals. Let the finer details make a big impression with a modern or minimalist gallery wall—or opt for a maximalist design with bright pieces, busy artwork, and more!
Gather Artwork or Photos
Once you’ve decided on your gallery wall theme, start collecting your featured pieces. Depending on your budget, you can gather artwork by checking out local thrift stores and art galleries, browsing wall prints online, or making your own DIY gallery wall art. Consider canvas pieces, lightweight sculptures, neon signs, and more to anchor the gallery design. You might also consider a gallery wall of family photos, or a mixture of photos and art. Photos are easy to edit to match any theme, whether you’re making a black and white gallery wall or looking for a way to add in more color. Add multiple photos to one frame to give your photo wall some diversity, and squeeze in some personal touches.
Play with Dimension
As you continue collecting pieces for your gallery wall, it’s good to keep in mind that it doesn’t have to be composed of just flat, framed pieces and photos. Instead, you can play around with three-dimensional pieces like sculptures, mirrors, or even musical instruments! Like houseplants? Mount a couple of plants throughout your gallery wall, add a plant shelf, or consider a gallery wall with an urban jungle influence. String lights around pieces, hang varying sizes of disco balls, or use strategic spotlight placement. Sculptural pieces can help fill in any gaps while adding visual interest as you build a gallery wall.
Vary the Sizes of Featured Pieces
Depending on what mood you want your photo wall to inspire, you may want to consider keeping the featured pieces consistent in size. This will allow you to keep better track of how many and what color picture frames you should get for your gallery wall. However, some design styles like Bohemian and cottagecore are better displayed in gallery walls that use different sizes of featured work. You can create even more of a size difference by not framing some pieces, and paying attention to how the thickness of frames adds to the size and emphasis of the art.
Find a Sense of Cohesion
Wondering how to create gallery wall cohesion? As you gather all your pieces, consider how each piece works together. Combine different interior design styles to create a look that fits your aesthetic. Don’t be afraid to mix and match colors, frame materials and designs, and types of work—and repeat colors and materials to help your gallery wall blend. Condense your collection to pieces that work well and highlight one another, as you’ll want to make sure each piece is on theme.
Experiment with Your Gallery Wall Layout
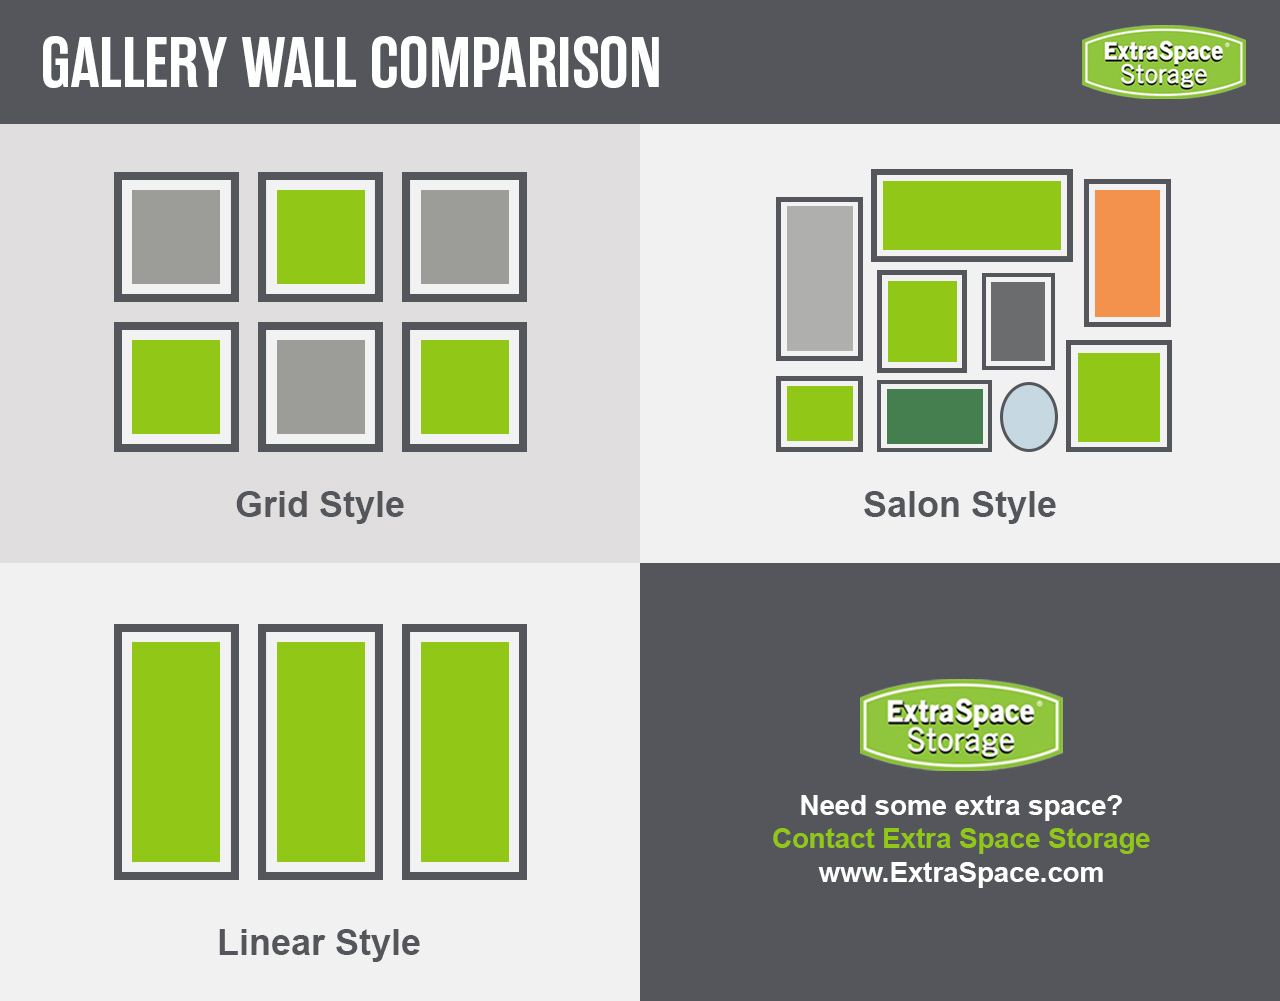
Creating a photo wall layout before hanging items can save you a lot of trouble! Measure the space you want to create a gallery wall on, then outline it on your floor. Once you’re happy with your layout, outline the frames or shape of each item with paper, then tape it where you’re going to be arranging the photos on the wall—and rearrange to experiment with different placements and positions. Here are a few wall gallery layout types you could consider trying out:
- Grid: Use identical or near-identical shapes and sizes of pieces for a more geometric and clean gallery wall layout—great for modern spaces.
- Salon-Style: Use pieces of differing shapes, colors, sizes, and orientations to add intrigue to your gallery wall.
- Linear: Hang gallery wall photos horizontally or vertically for a minimal look with some personality.
Start Hanging Your Gallery Wall
Hanging a gallery wall can be tricky, so be sure to use the right tools—your stud finder, nails, hammer, tape, pencil or marker, level, tape measure, and frames. Here’s how to utilize these tools to create a picture wall:
- Use your stud finder to determine the best place to hang heavy items without anchors.
- Map out and mark stud locations, where your pieces will hang, and where you’ll hammer with painter’s tape or a pencil.
- Use the level to ensure gallery wall pieces are evenly horizontal.
- Ensure even gaps between your pieces with measuring tape.
- Hammer the appropriate nails into the spots you marked.
- Finish your photo wall design process by hanging your photos and art.
Explore Renter-Friendly Gallery Walls
If you need renter-friendly gallery walls, rather than using anchors or even screws, make an easy gallery wall with nails or double-sided adhesive that won’t pull off paint. Or, if you can afford some holes but don’t want a ton, install floating shelves! You can easily place and replace your artwork, photos, frames, and more, as they won’t be nailed into the wall. Or consider hanging frames from aesthetic chains.
Store Extra Pieces Properly
After you’ve decided on the layout of your pieces and gotten them up on your gallery wall, you might find that you have extra photos, art pieces, and frames, especially during renovations. If that’s the case, storing your items while you build can help. Wipe down each piece, wrap them in acid-free paper or foam padding, and carefully pack them up. Consider getting a climate-controlled storage unit to help ensure your picture frames, art pieces, and photos stay in good condition.
Frequently Asked Questions About Creating a Gallery Wall
How many pieces of art should I use for a gallery wall?
A typical gallery wall layout contains about five to nine pieces of art and should cover roughly 60 to 75% of the wall width, but it depends on the size of the space you are using, the size of your pieces, and the number of pieces you display.
How far apart should gallery wall frames be?
Approximately two to three inches between the frames, or up to four to six inches of space for larger statement pieces. The group should also be eye level (around 57 to 60 inches from the floor to the center of the arrangement).
Do picture frames have to match?
Picture frames do not need to match! If you’re going for a neat gallery wall, matching frames would simplify it and pull the look together. But if the aesthetic you’re trying to achieve involves a bit of variety, different frames is a great way to embrace that look.
***
Need more room while creating your gallery wall? Extra Space Storage has many convenient self storage locations nationwide to help you store art while renovating your home or moving. Find storage units near you!
