Need to rent a storage unit? Extra Space Storage has self storage facilities across the U.S. with a wide range of storage unit prices, sizes and convenient amenities available. If you’re new to self storage and aren’t sure how the storage rental process works, this storage guide will walk you through the basics!
- How to Rent a Storage Unit with Extra Space Storage
- How Extra Space Storage Rapid Rental Works
- How to Prepare for Move-In Day with Extra Space Storage
How to Rent a Storage Unit with Extra Space Storage
Renting storage through Extra Space Storage is simple. If you visit our website, you can find storage facilities in your area, find the storage unit that meets your needs, and reserve it!
Step 1: Search by City, State, Zip, or Specific Address
When you land on the Extra Space Storage homepage, you can start your self storage search by looking up our facilities using one of the following: city name, state name, zip code, or personal or business address. Our website will then direct you to a page with facility listings related to your search term.
Step 2: Select the Unit Size & Amenities You Need
Once you’ve found an Extra Space Storage facility near your location, you can choose from a variety of storage unit sizes and amenities, including business storage, drive-up access, climate control, vehicle storage, and more!
Step 3: Reserve Your Storage Unit
After you’ve found a storage unit for your needs, you’ll want to make a reservation! You can rent self storage with Extra Space Storage by phone, while visiting a storage facility, or online with Rapid Rental.
How Extra Space Storage Rapid Rental Works
With Extra Space Storage Rapid Rental, you can secure your storage unit reservation online in six easy steps.
Step 1: Personal Info
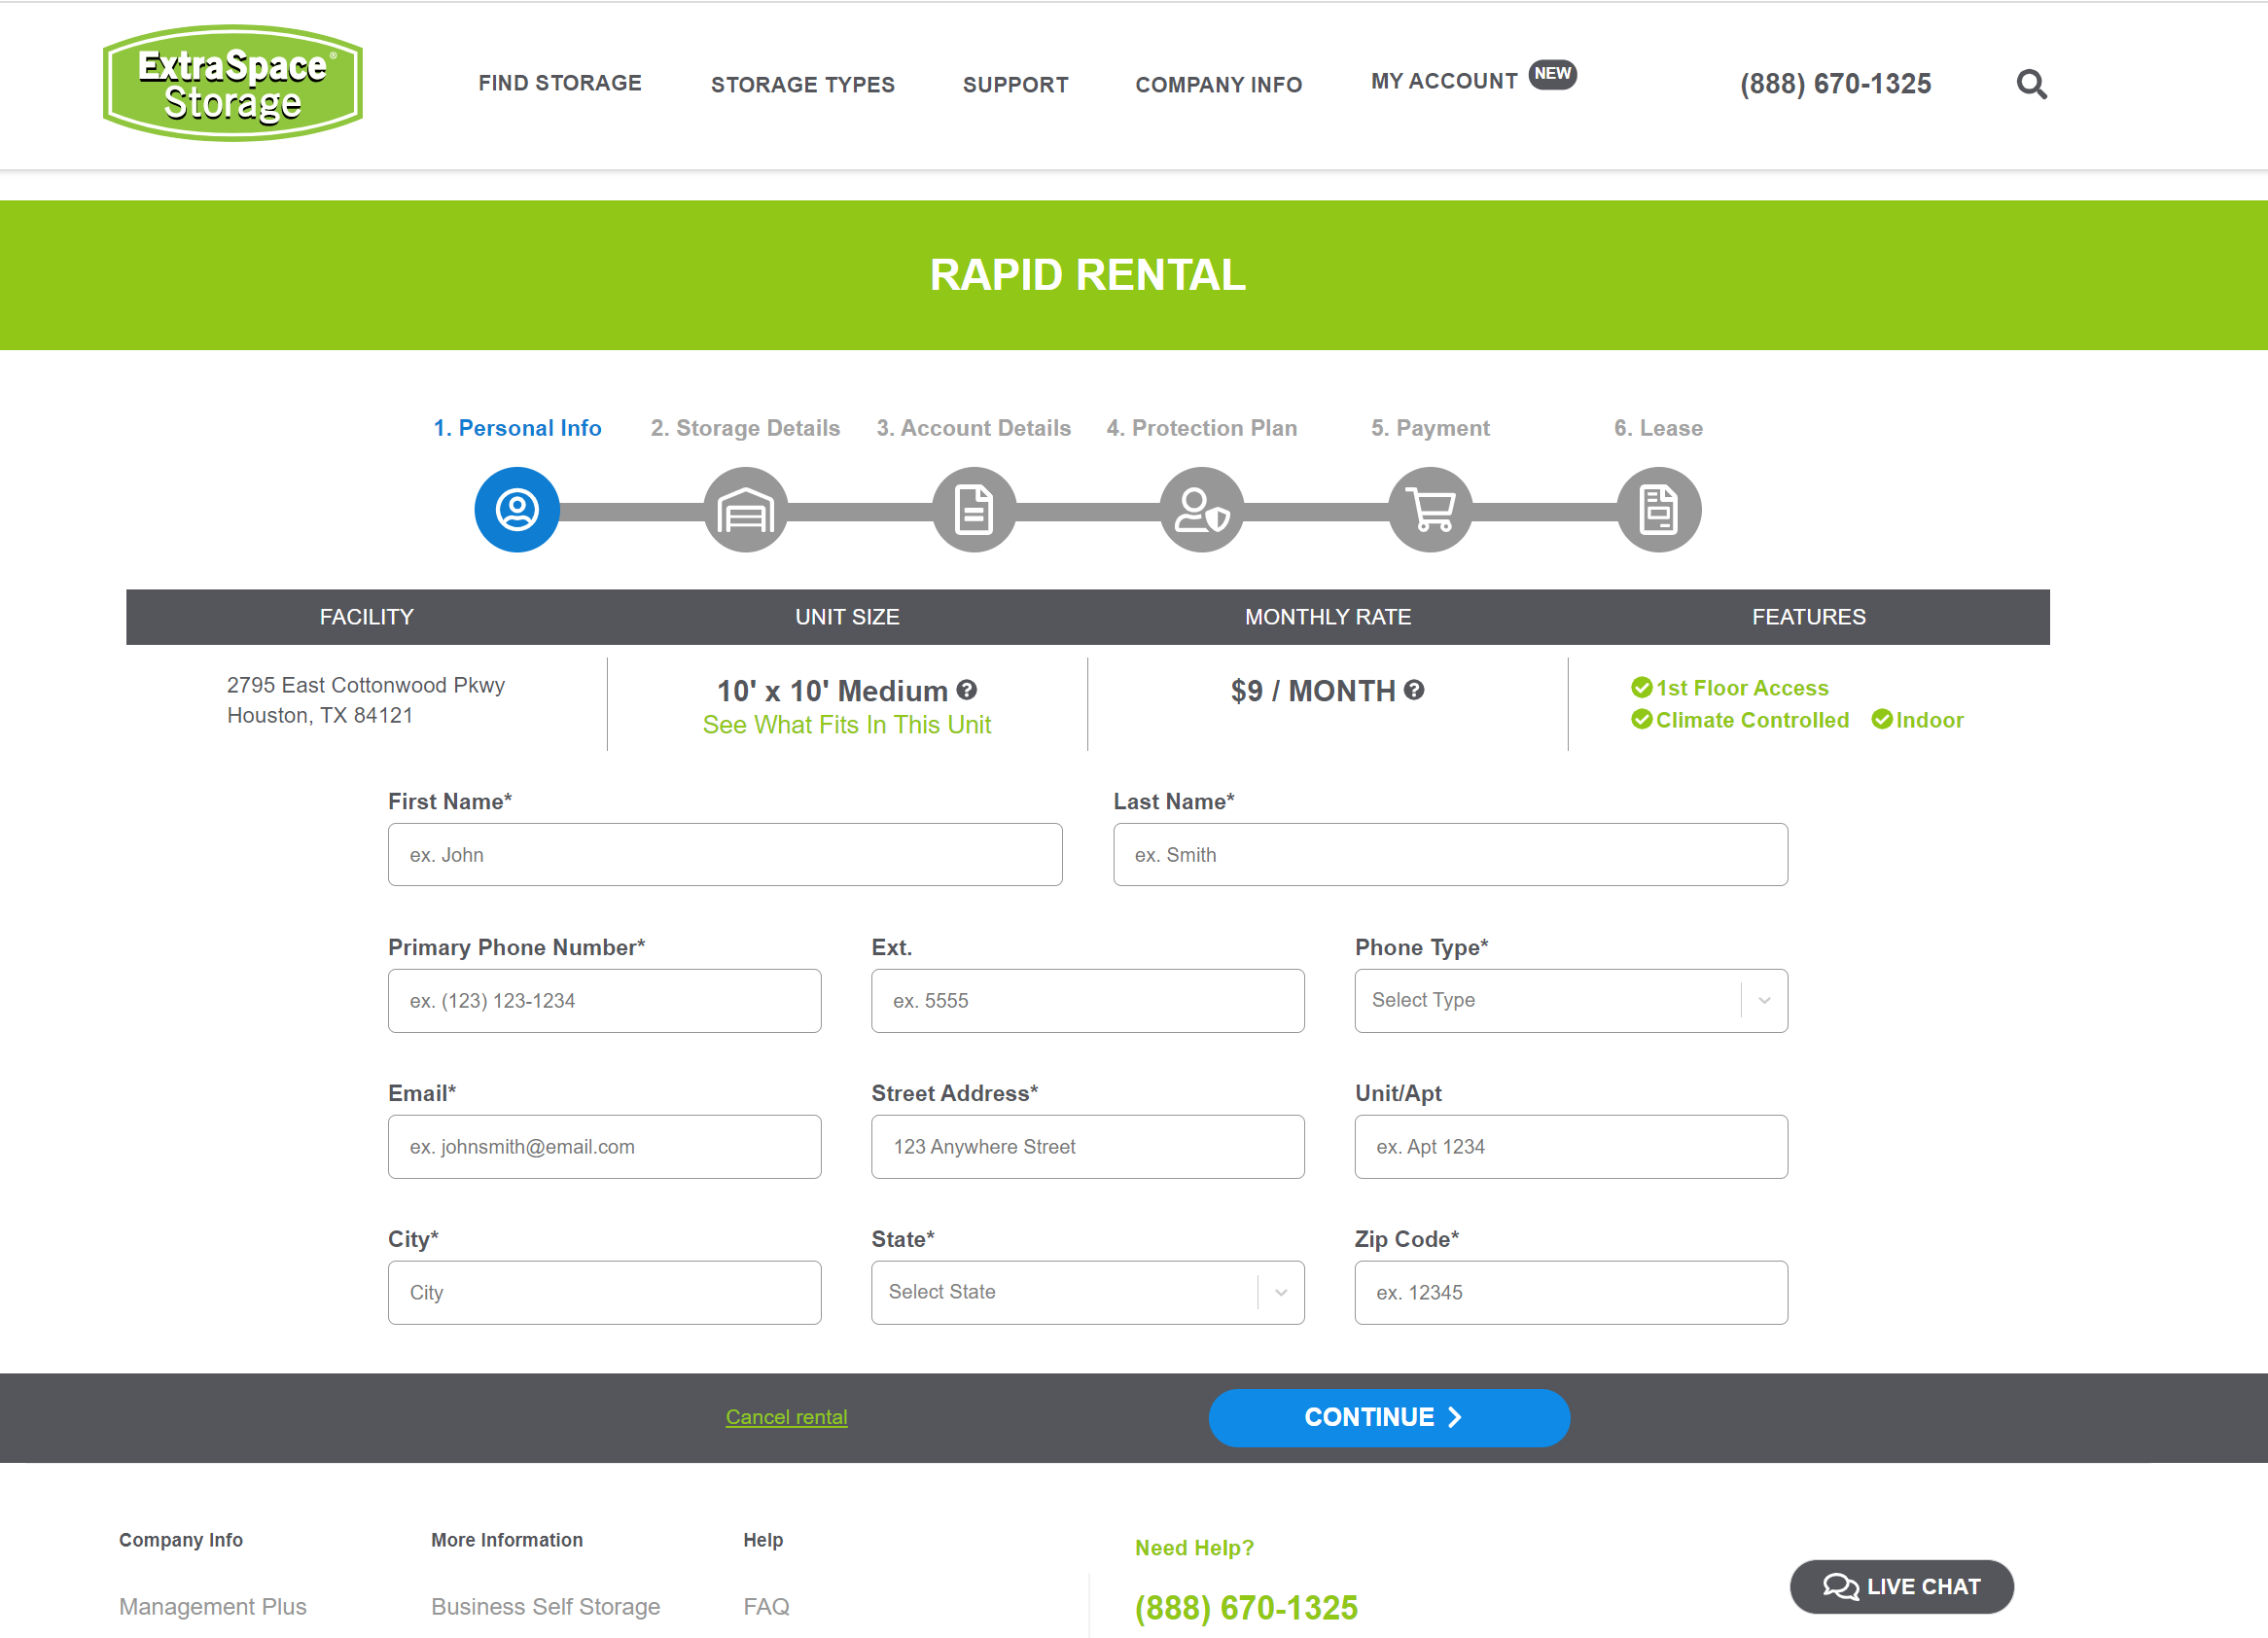
When you use the Rapid Rental process to reserve a storage unit, you’ll be asked for personal information like name, phone number, email address, and home or business address.
Step 2: Storage Details
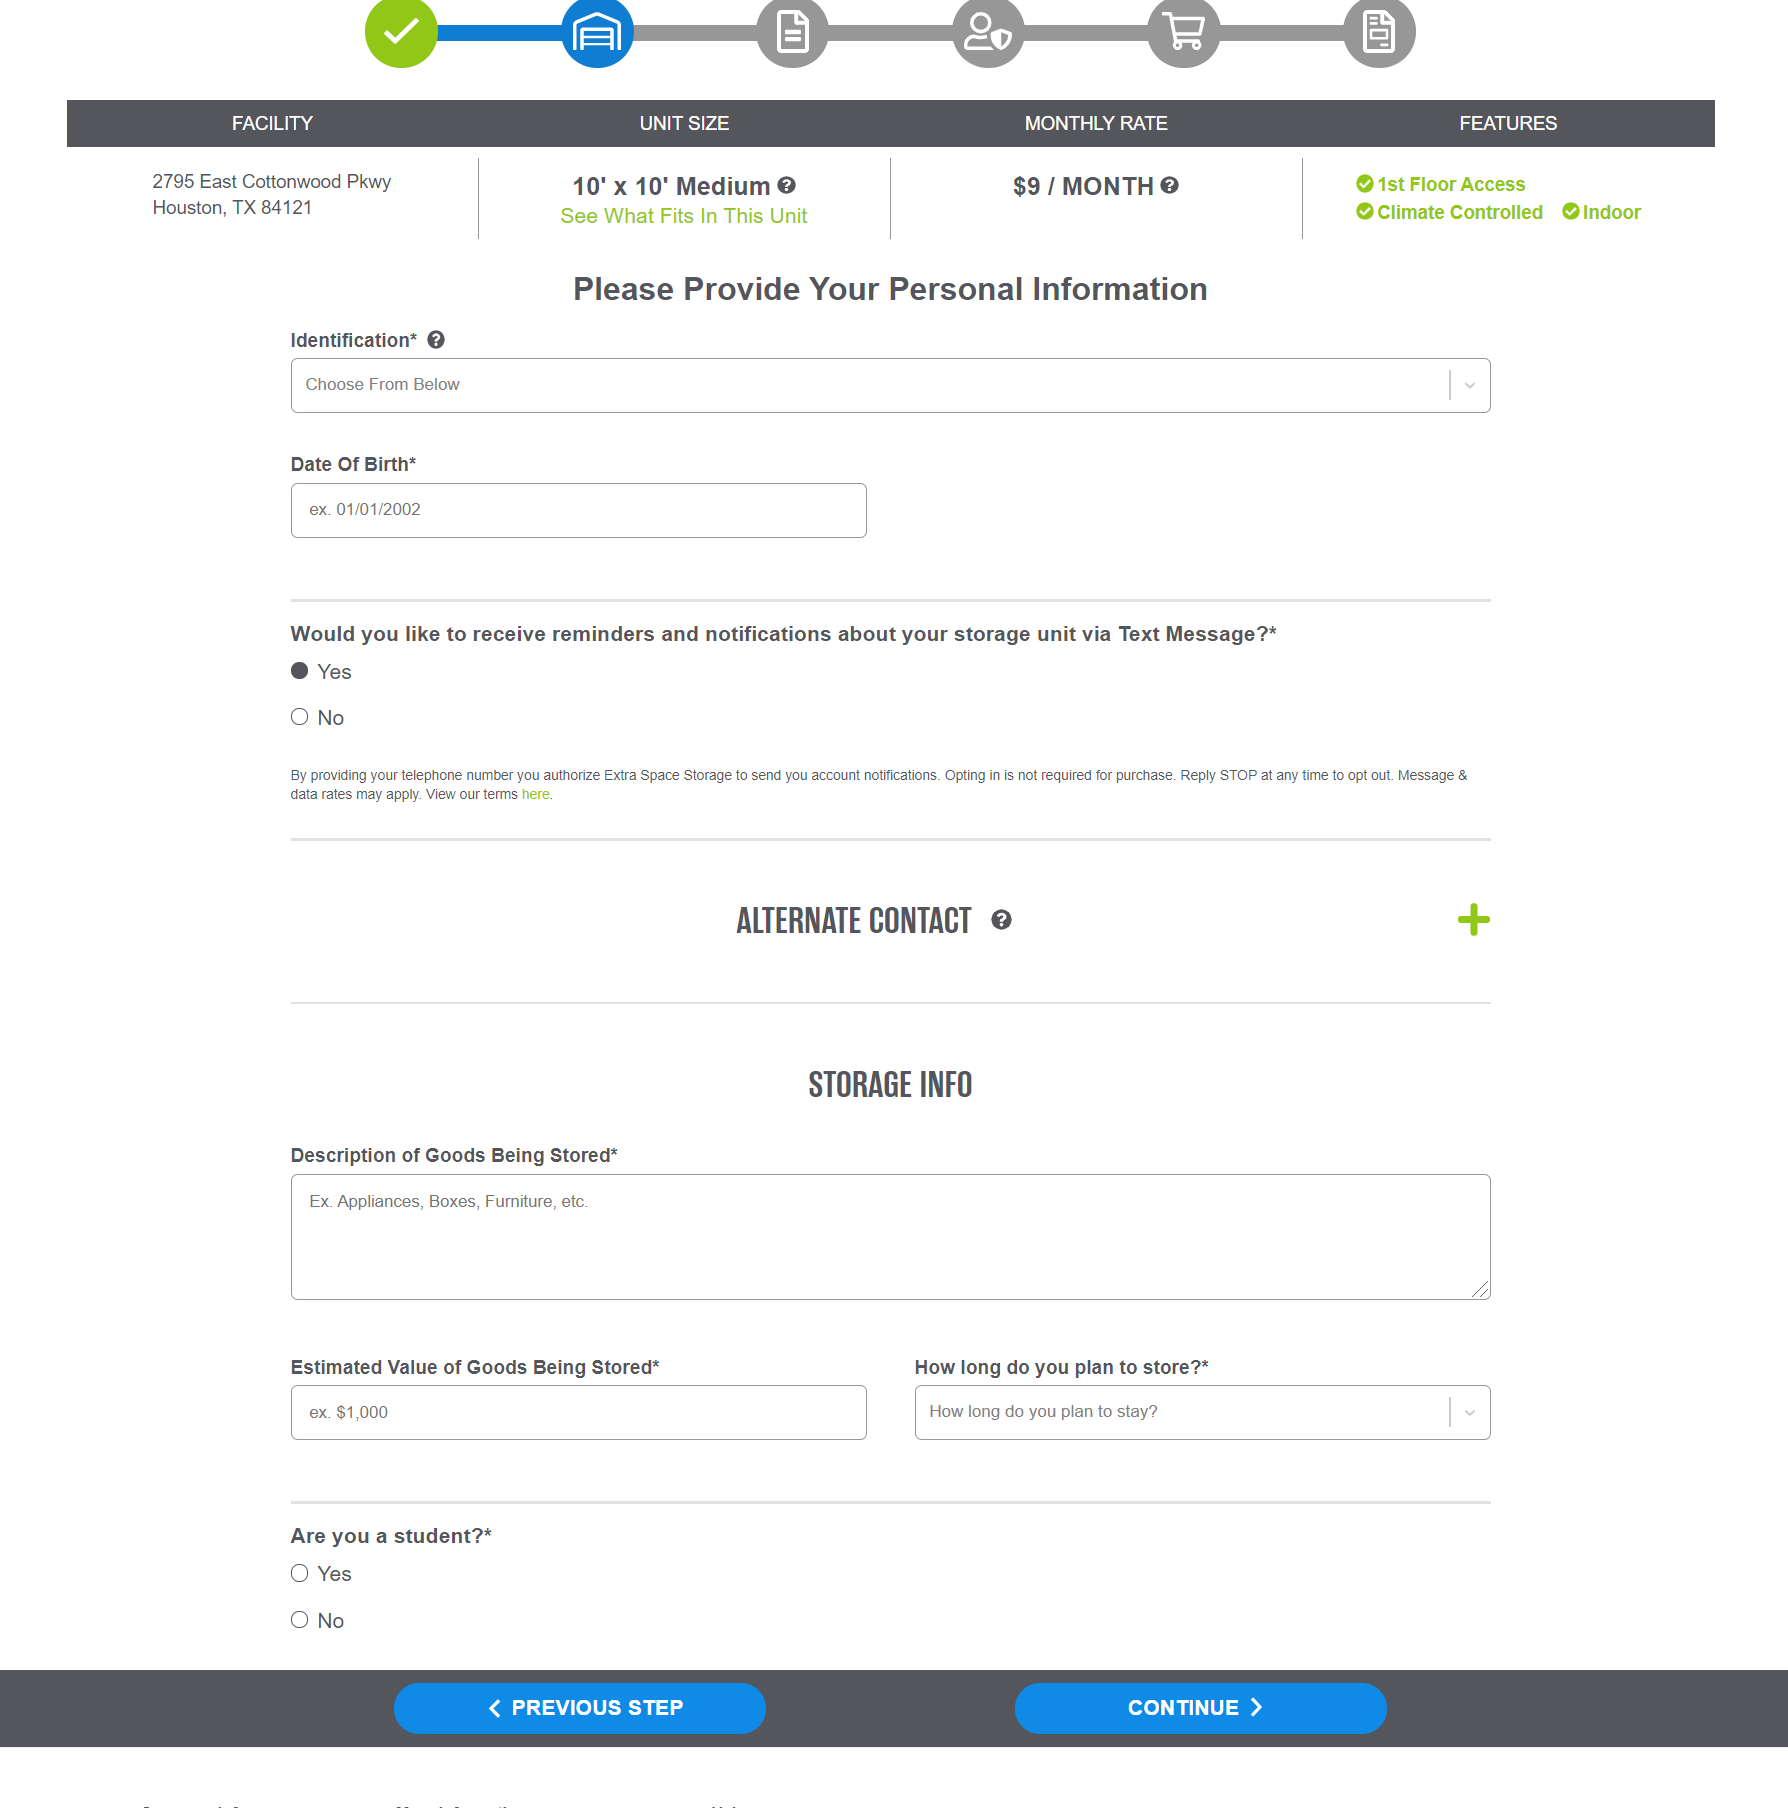
After entering personal information, you’ll need to enter storage details, including a description of goods being stored, the estimated value of each item, and expected rental duration. You will also be asked for your date of birth and a form of identification, such as a driver’s license or passport. You can even opt in to receive text reminders from Extra Space Storage and add an alternate contact in case of emergency in this step.
Step 3: Account Details
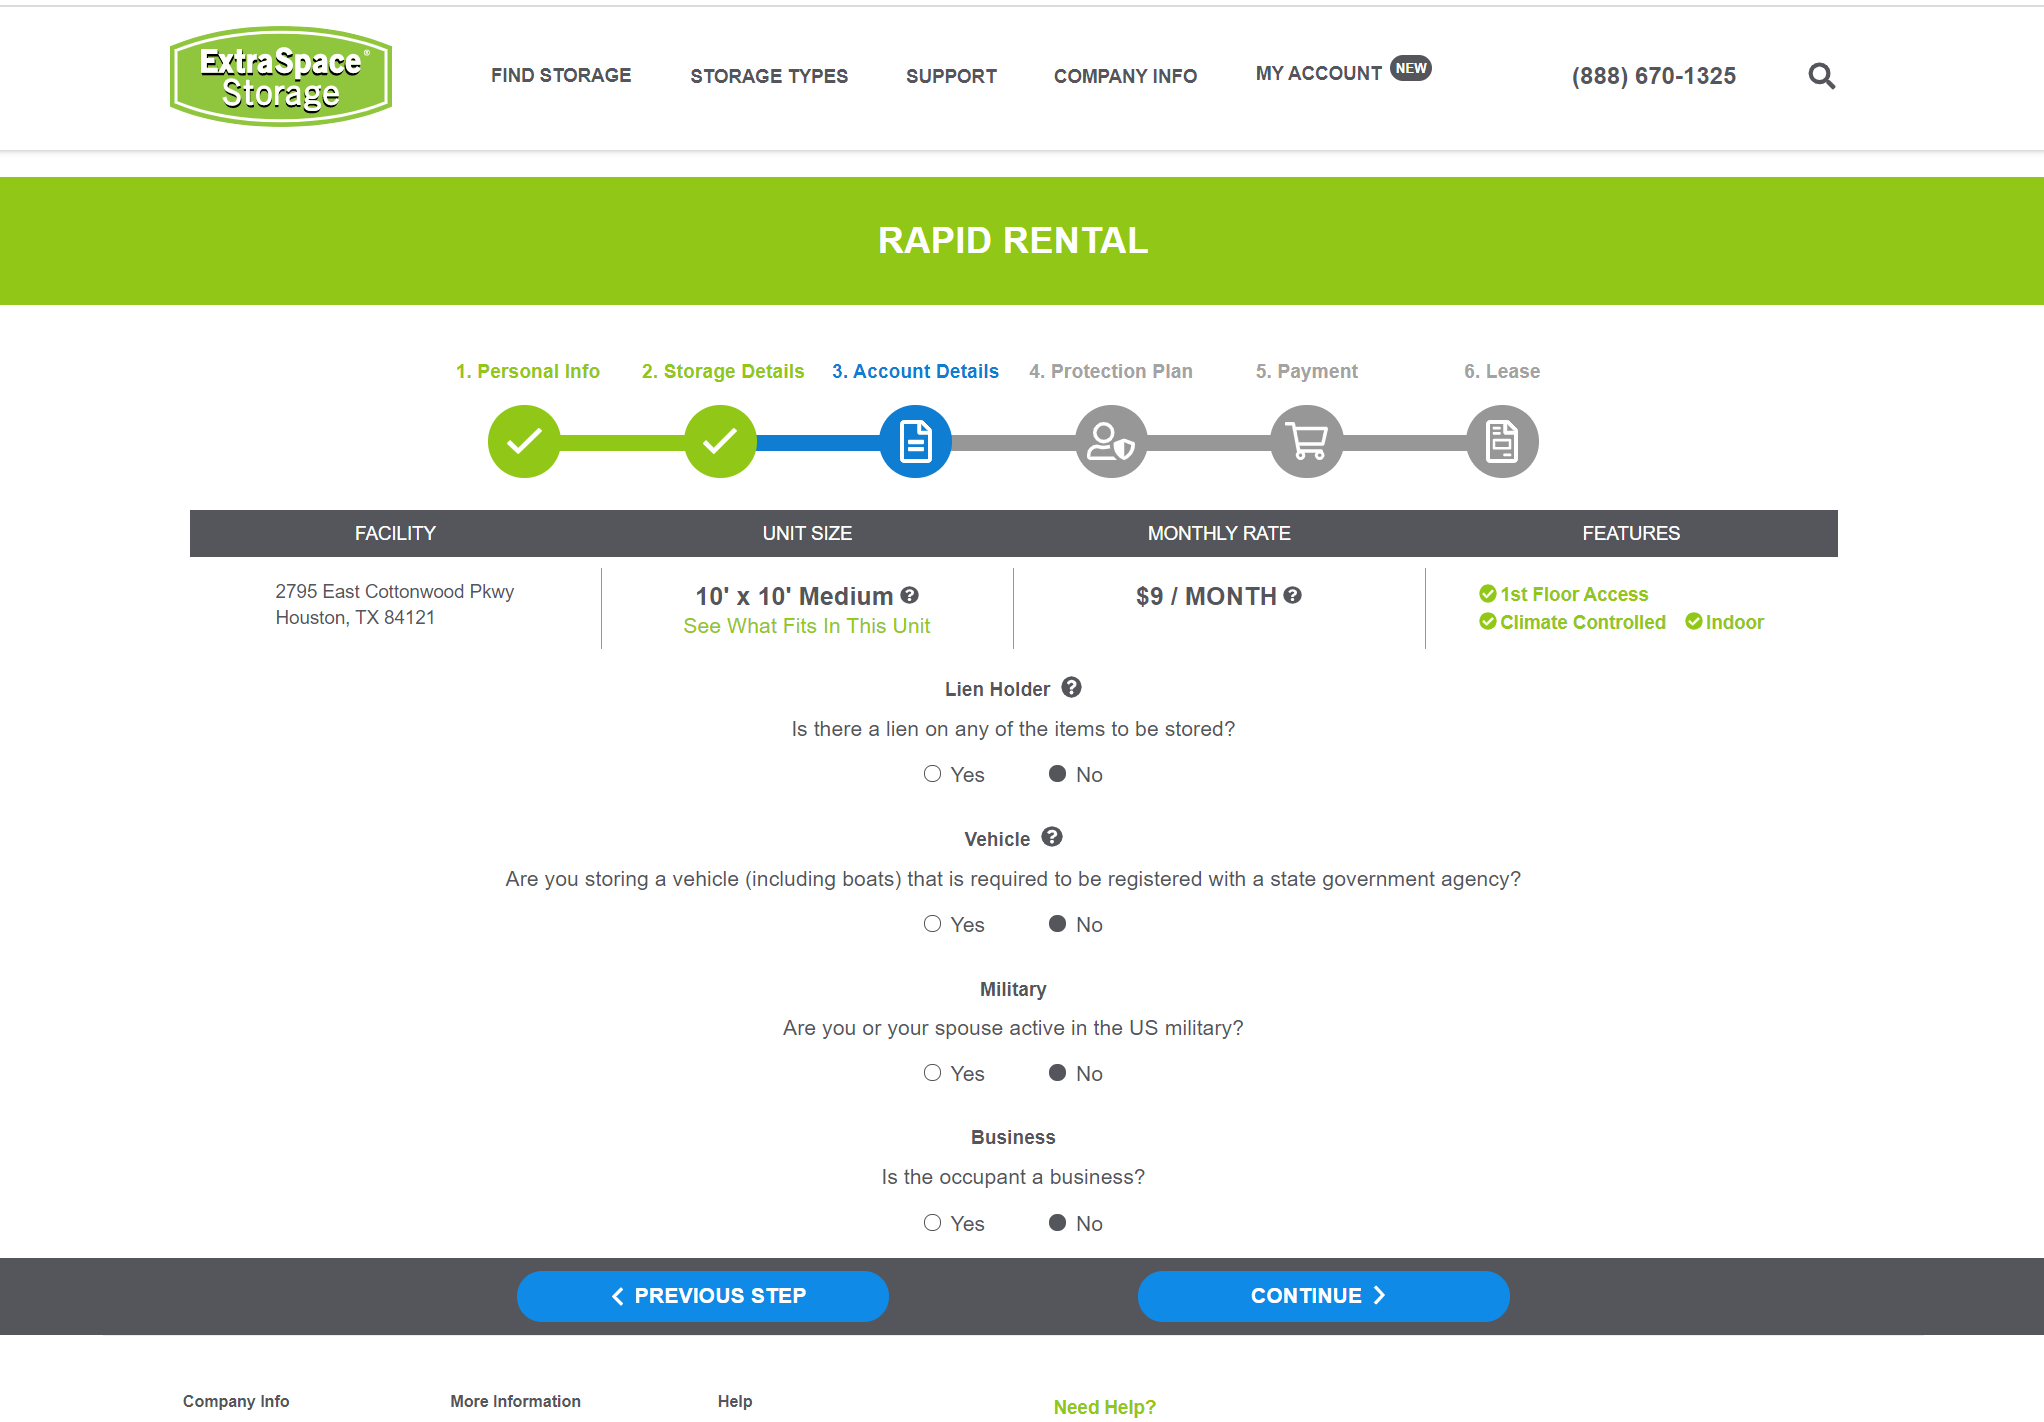
Next, you must disclose if there’s a lien on any items, if you plan to store a vehicle, or if you’re using your storage unit for business storage. While creating your account, you’ll also be asked if you’re a college student or active U.S. military.
Step 4: Protection Plan
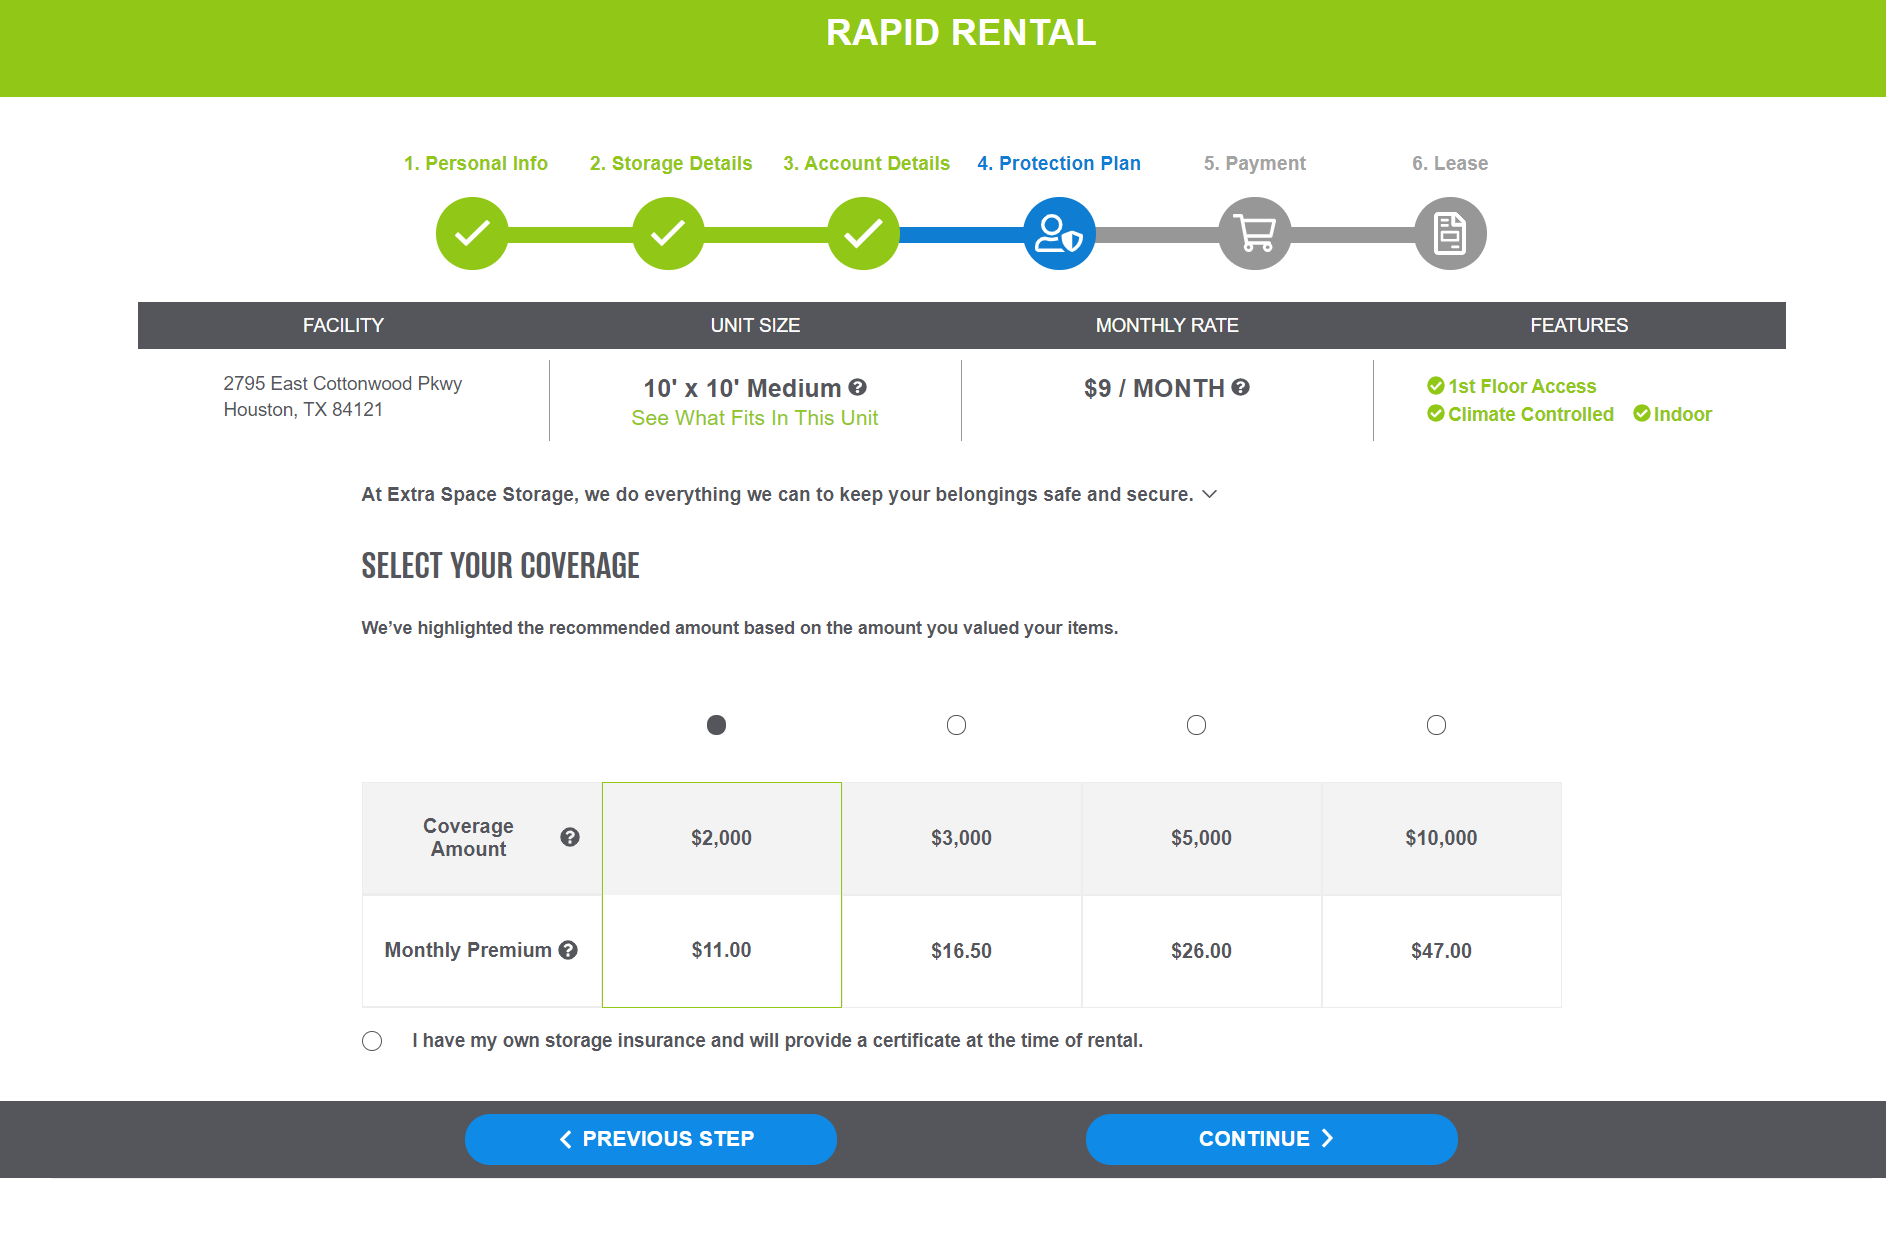
Once your account details are set, you’ll be asked for your protection plan paperwork. Regardless of what kind of storage unit you rent with Extra Space Storage, you’ll need a storage insurance policy. You can either provide proof of insurance or get coverage through Extra Space Storage.
Step 5: Payment
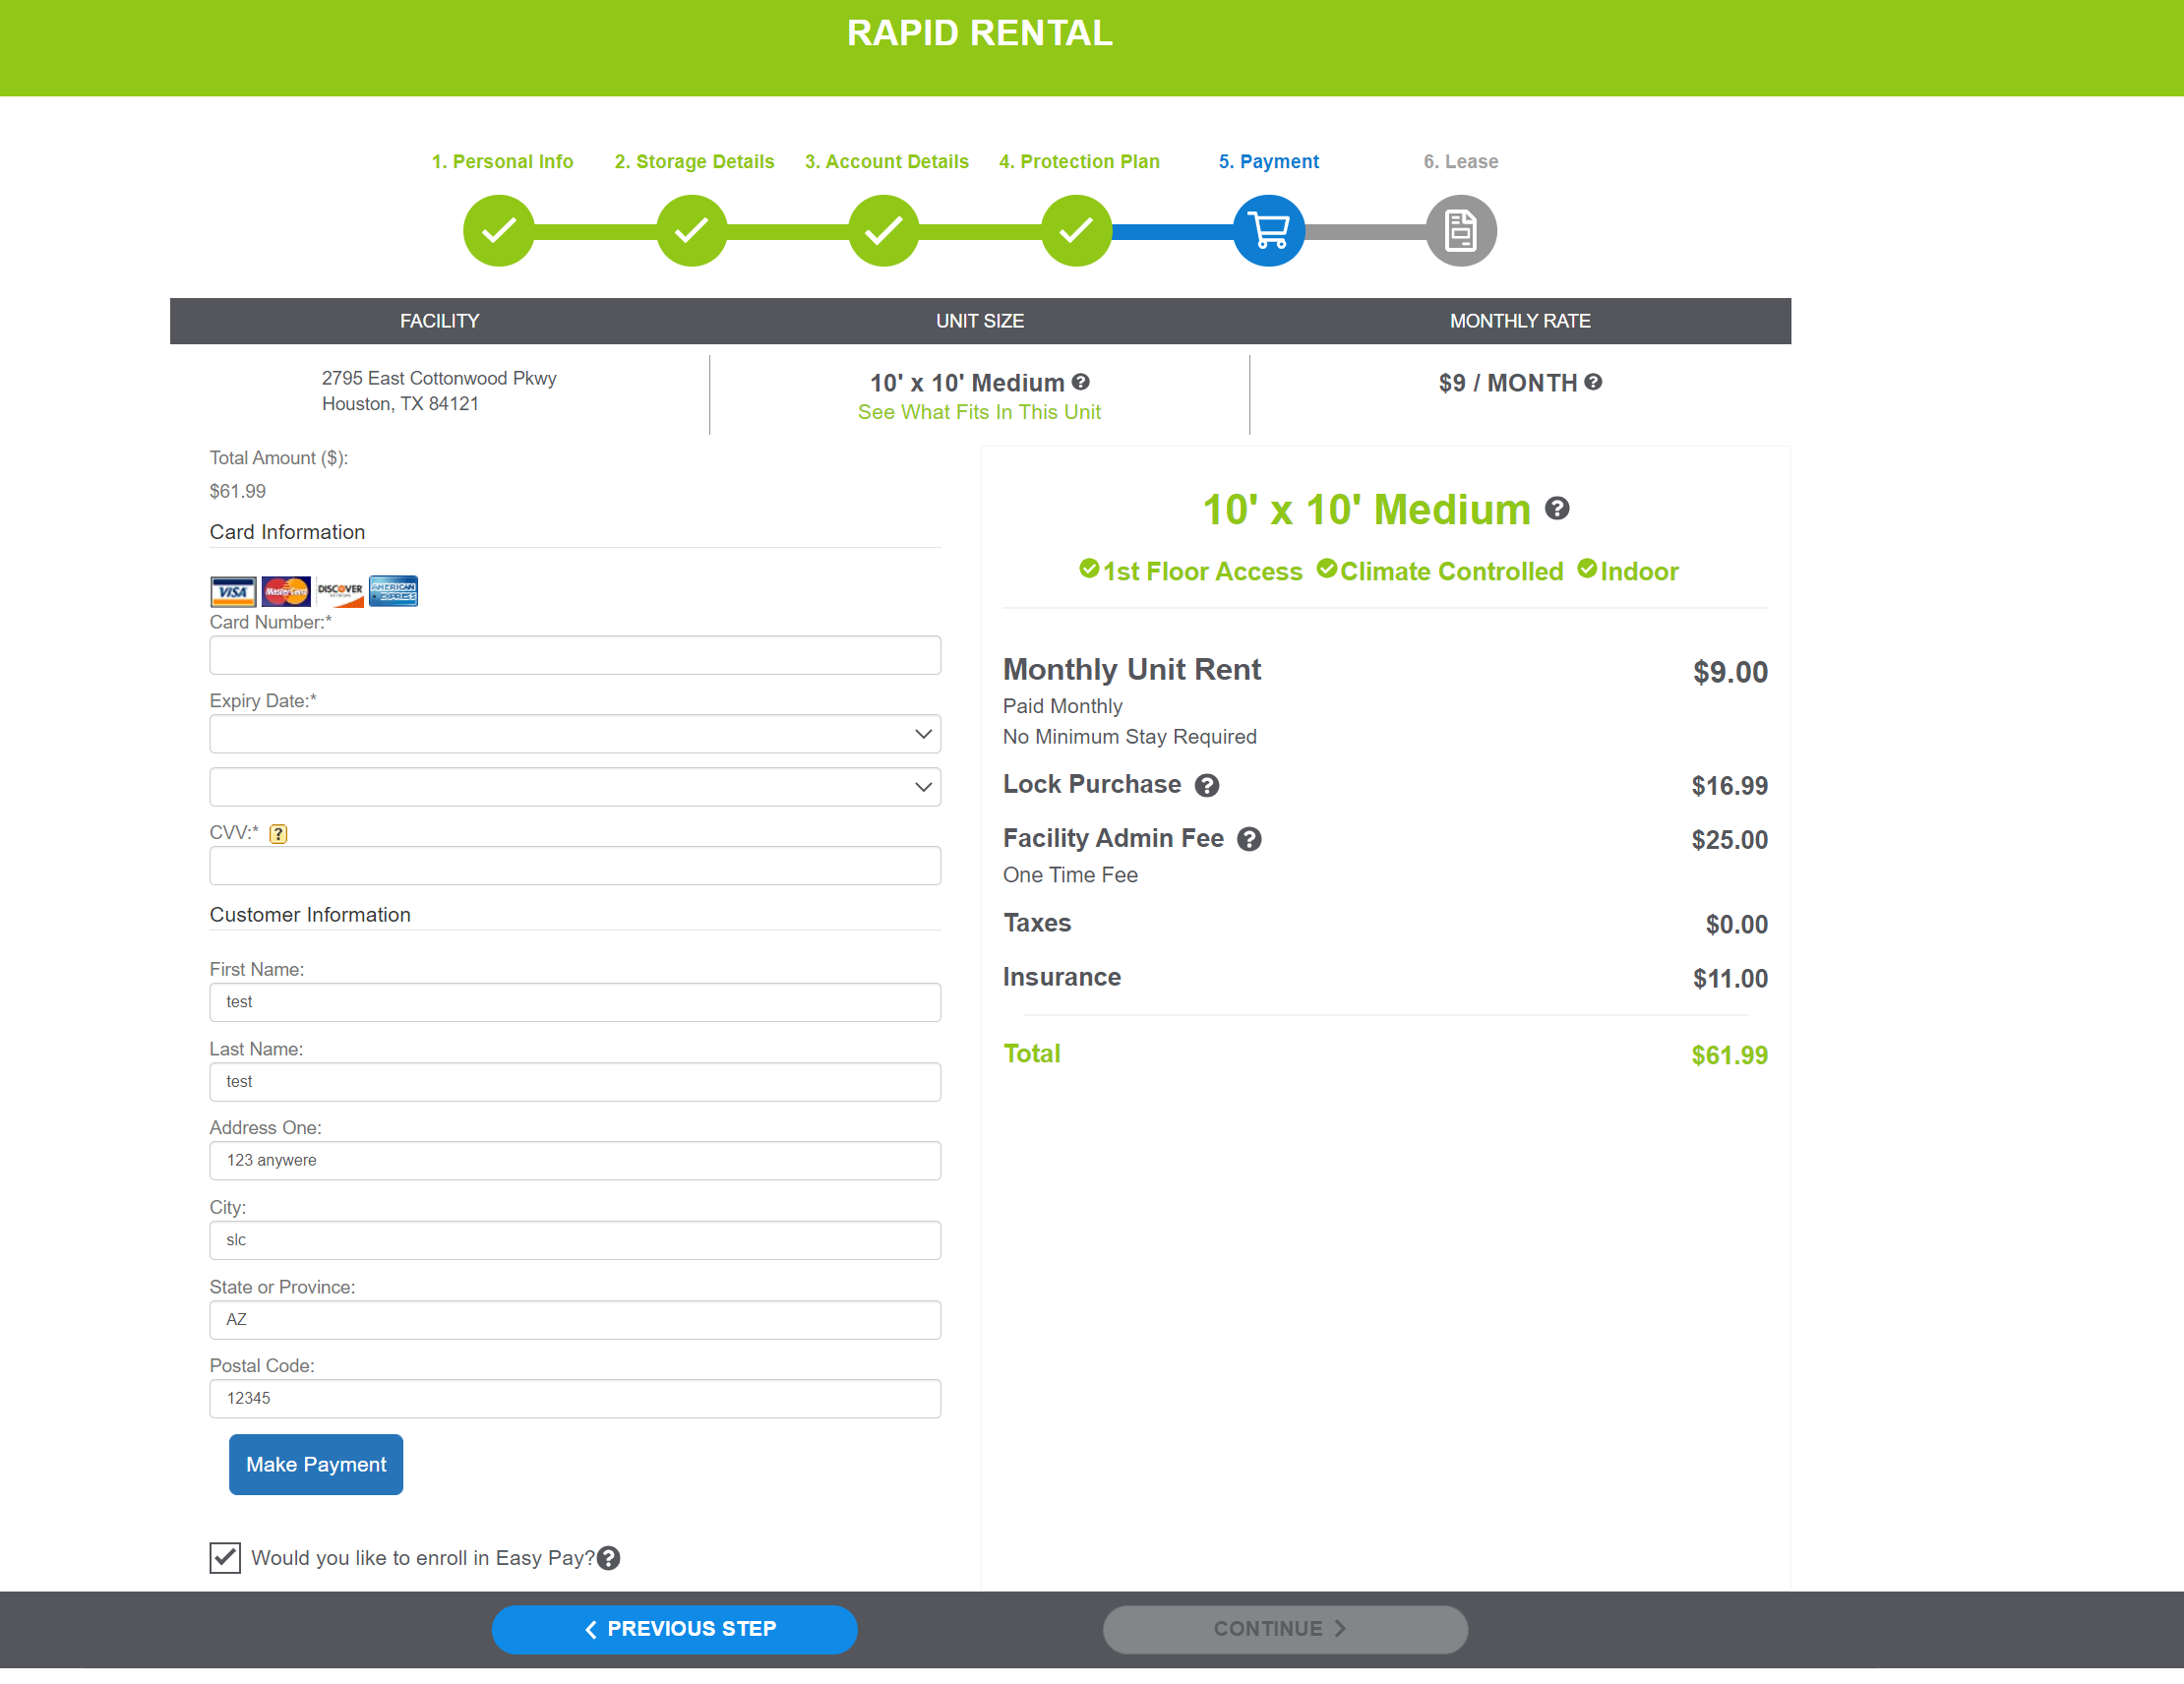
Finally, when completing a self storage application, you can set up payment with any major credit or debit card. You also have the option to enroll in Easy Pay through your online account, so you never have to worry about missing a payment!
Step 6: Review & Sign Your Self Storage Agreement
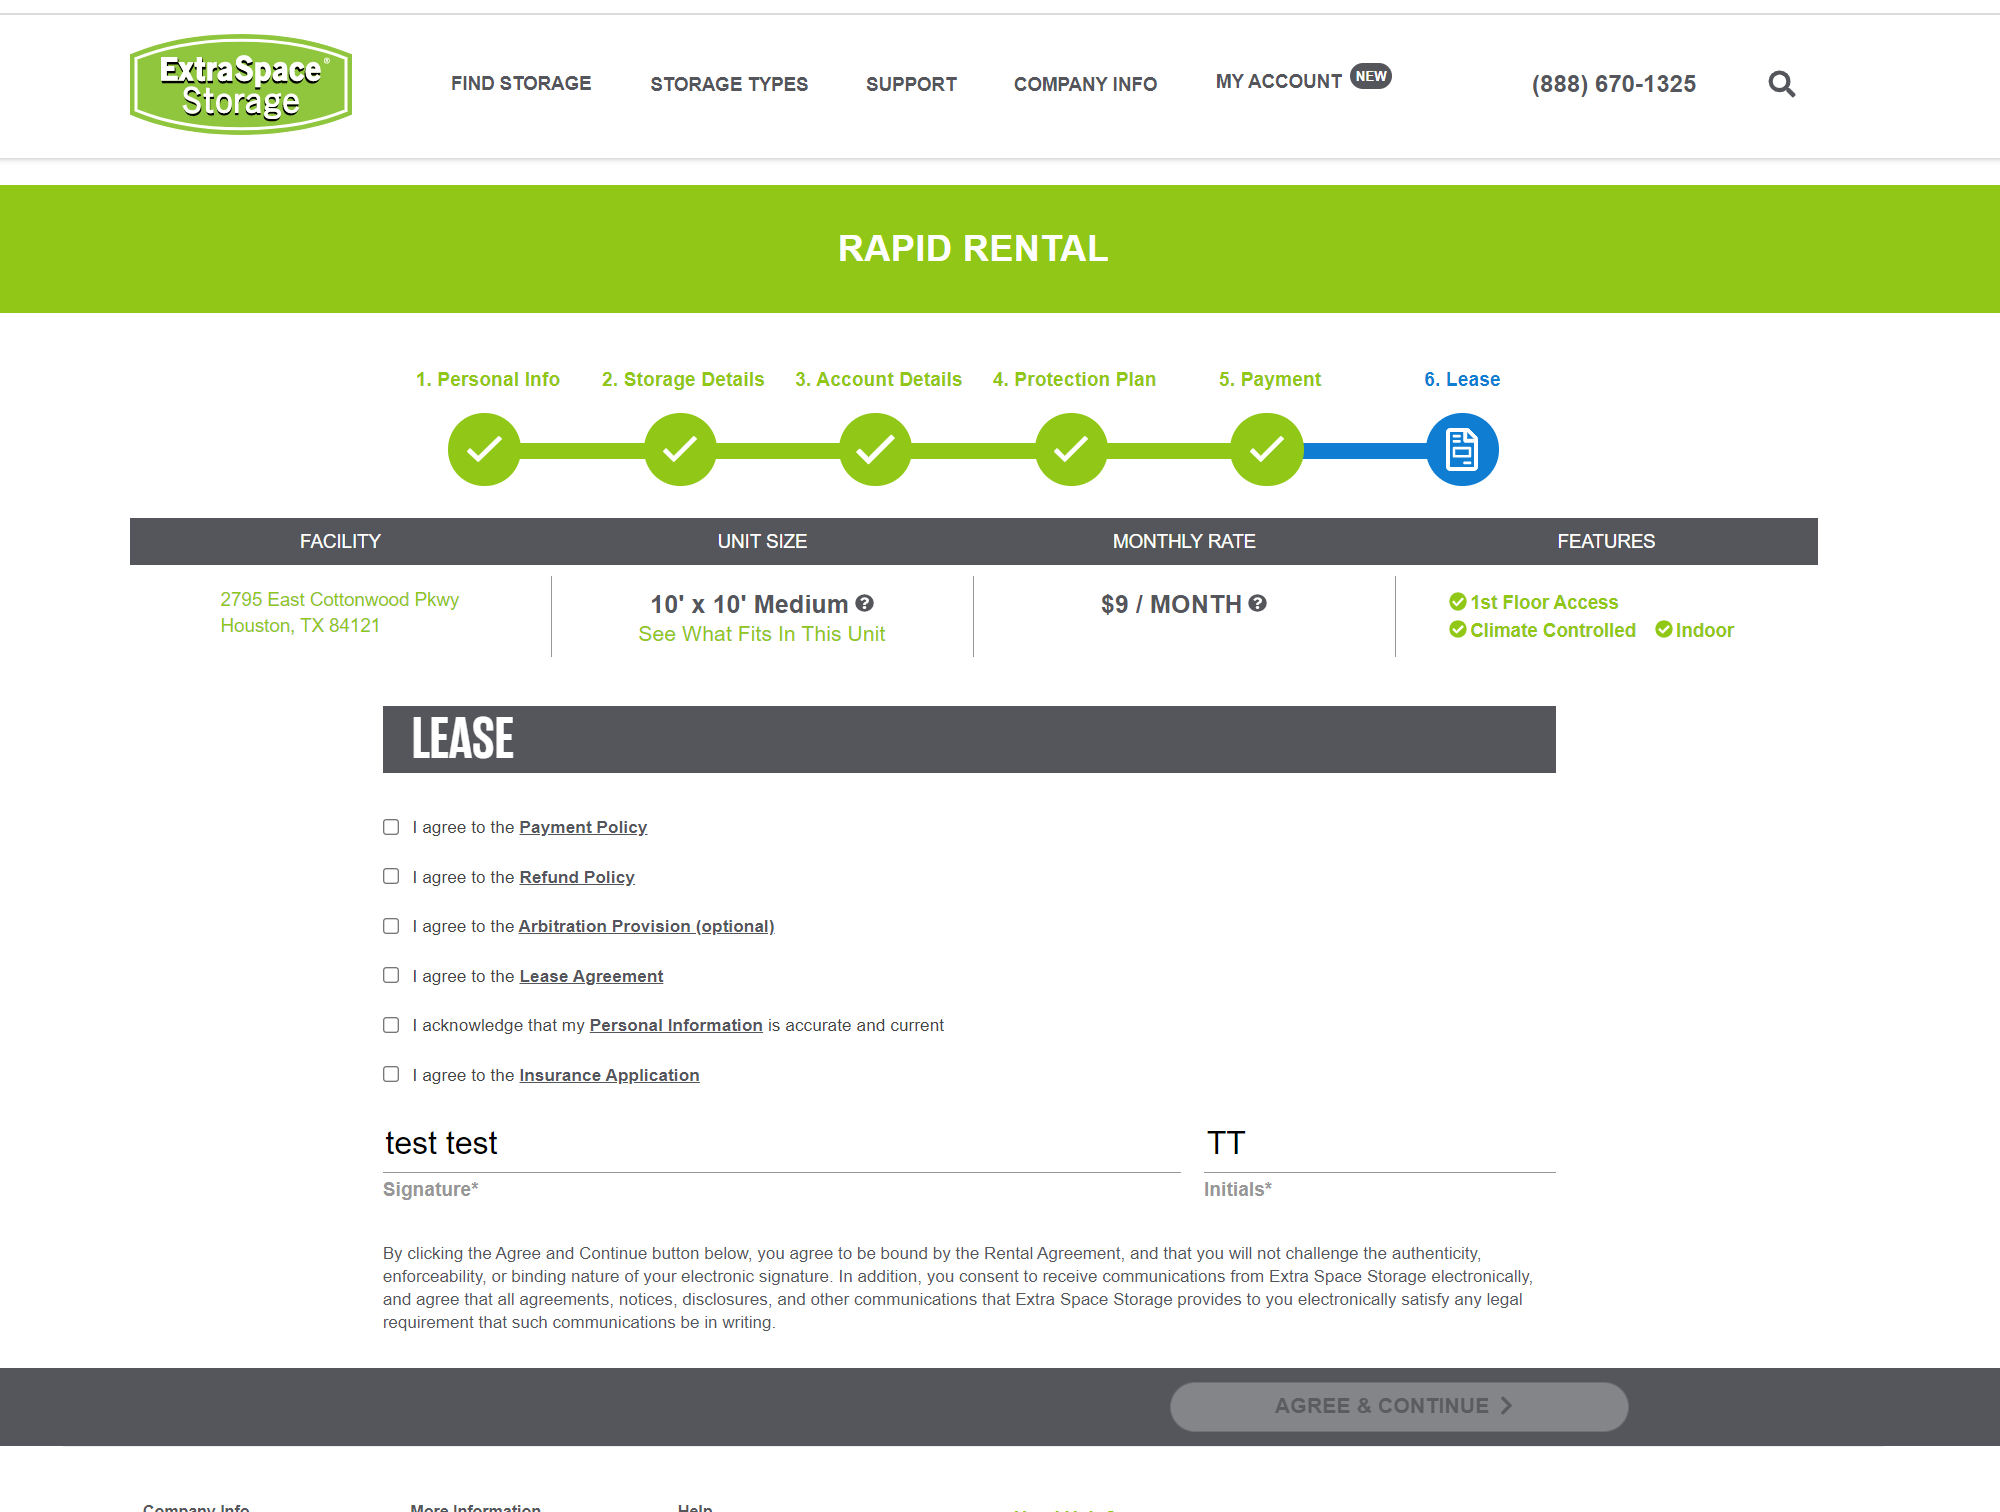
Once you’ve finished the online reservation process, you can expect a phone call or email from Extra Space Storage with instructions on how to complete the lease agreement. When completing the rental agreement, you must confirm you’ve included accurate personal information and agree to payment and refund policies. At this time, you will also attach your insurance applications, if you wish to receive a policy via Extra Space Storage. After agreeing to the terms and conditions, you can digitally sign the contract.
How to Prepare for Move-In Day with Extra Space Storage
After finding a storage unit and reserving it, it’s time to organize and pack your items for move-in day. If you need boxes or other moving supplies, these are available for purchase at Extra Space Storage locations.
Step 1: Get Items Ready for Storage
Extra Space Storage can accommodate a variety of items, including furniture, appliances, clothing, electronics, documents, books, artwork, and more. Keep in mind, however, that you cannot store food, drugs, combustibles, or vehicles that aren’t in working condition. After packing your valuables, properly seal and label your boxes to protect your items and find them quickly when you need to retrieve them from your unit.
Step 2: Bring Your ID, Paperwork, & Lock
When you arrive at our storage facility, you’ll need to show your identification and any requested documents, such as proof of insurance. For security purposes, we also require customers to lock their storage units. Locks are not included with your rental, so you’ll either need to bring your own or purchase one at our facility.
Step 3: Move In & Organize Your Unit
Since you already prepped your items for storage, you just need to pack and organize your storage unit on move-in day! When unloading your belongings, be sure to place the heaviest and most stable boxes at the bottom, and try not to pile boxes too high, since it makes them difficult to reach and puts them at risk of toppling. Consider organizing your unit in sections, leaving aisles between items, and arranging your storage space so that frequently used items are toward the front.
***
Looking for affordable and secure storage units? Extra Space Storage has self storage facilities conveniently located throughout the U.S. Find self storage units near you!


