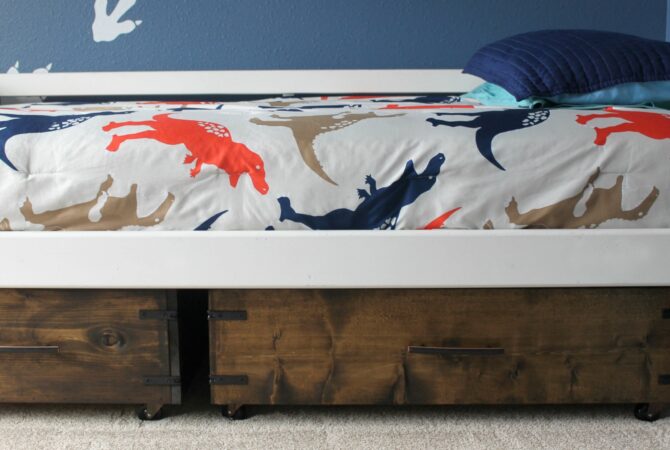
Looking for ways to maximize your bedroom storage? This DIY under-bed storage box is easy to put together and offers plenty of room to help you store clothes, seasonal decor, collectibles, and more. Build your own rolling under-bed drawers by following our simple step-by-step guide!
Supplies Needed
- ¾” x 2′ x 4′ piece of plywood
- 1″ x 12″ x 12′ wood board
- 2-inch casters (x4)
- Table saw
- Nail gun
- Finish nails (1¼” to 1½”, 16-18 gauge)
- Drill
- Wood screws in various lengths
- Drawer handle
- Screwdriver
- Sandpaper
- Stain, sealant, and/or paint
- Rags
- Safety glasses or goggles
- Hearing protection
- Mask
- Gloves
- Optional: 1¼” to 1½” screws (1 box)
- Optional: Power sander
- Optional: Wood glue
- Optional: Wood dowels
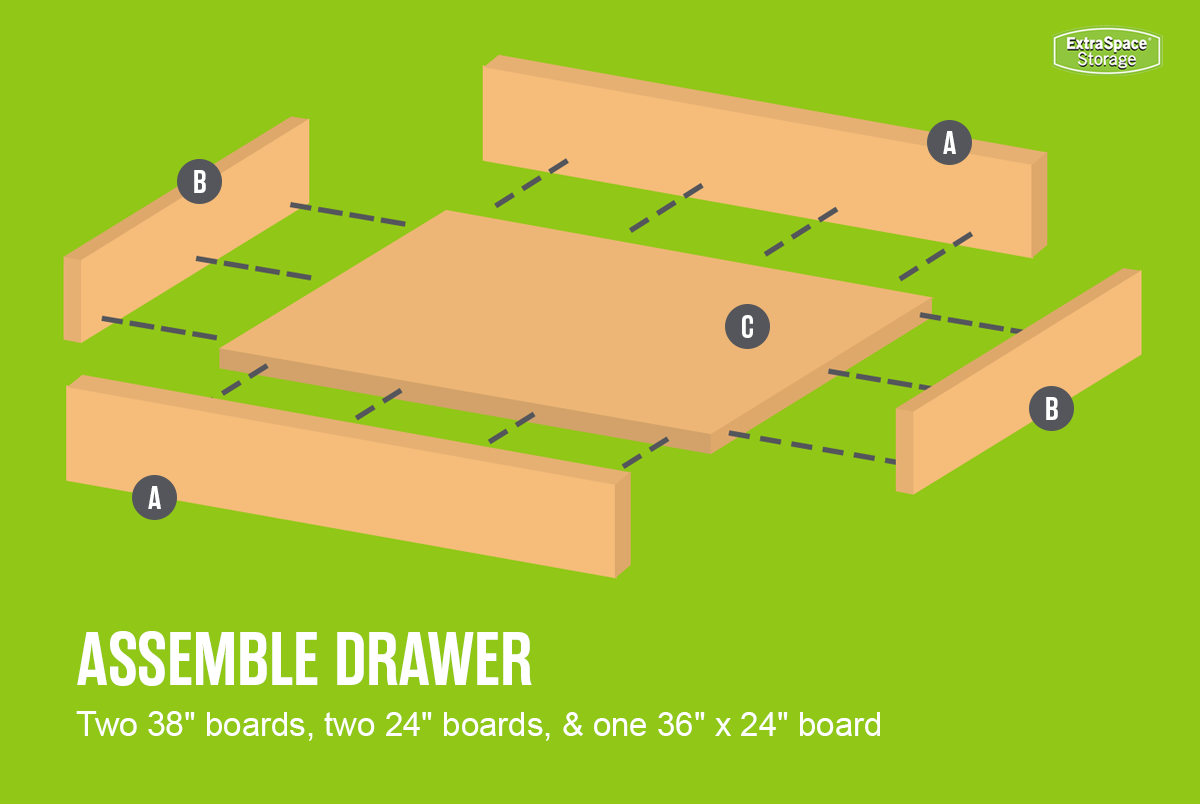
Cut List
- ¾” x 24″ x 36″ – drawer bottom
- 1″ x 12″ x 24″ (x2) – drawer sides
- 1″ x 12″ x 38″ (x2) – drawer front & back
Use caution when using power tools. Follow all manufacturer’s instructions and wear proper safety gear. There will be scrap wood left over from some of these cuts.
Step-by-Step Instructions for Under-Bed Drawers
Once you’ve gathered the supplies for a DIY under-bed storage box, you can begin the build process! While options like canvas bins, upcycled armoire drawers, or repurposed cardboard can save time, sturdy wooden drawers offer durability and a custom fit. Follow these simple steps to learn how to build under-bed storage drawers for yourself!
Step 1: Measure Your Bed Space
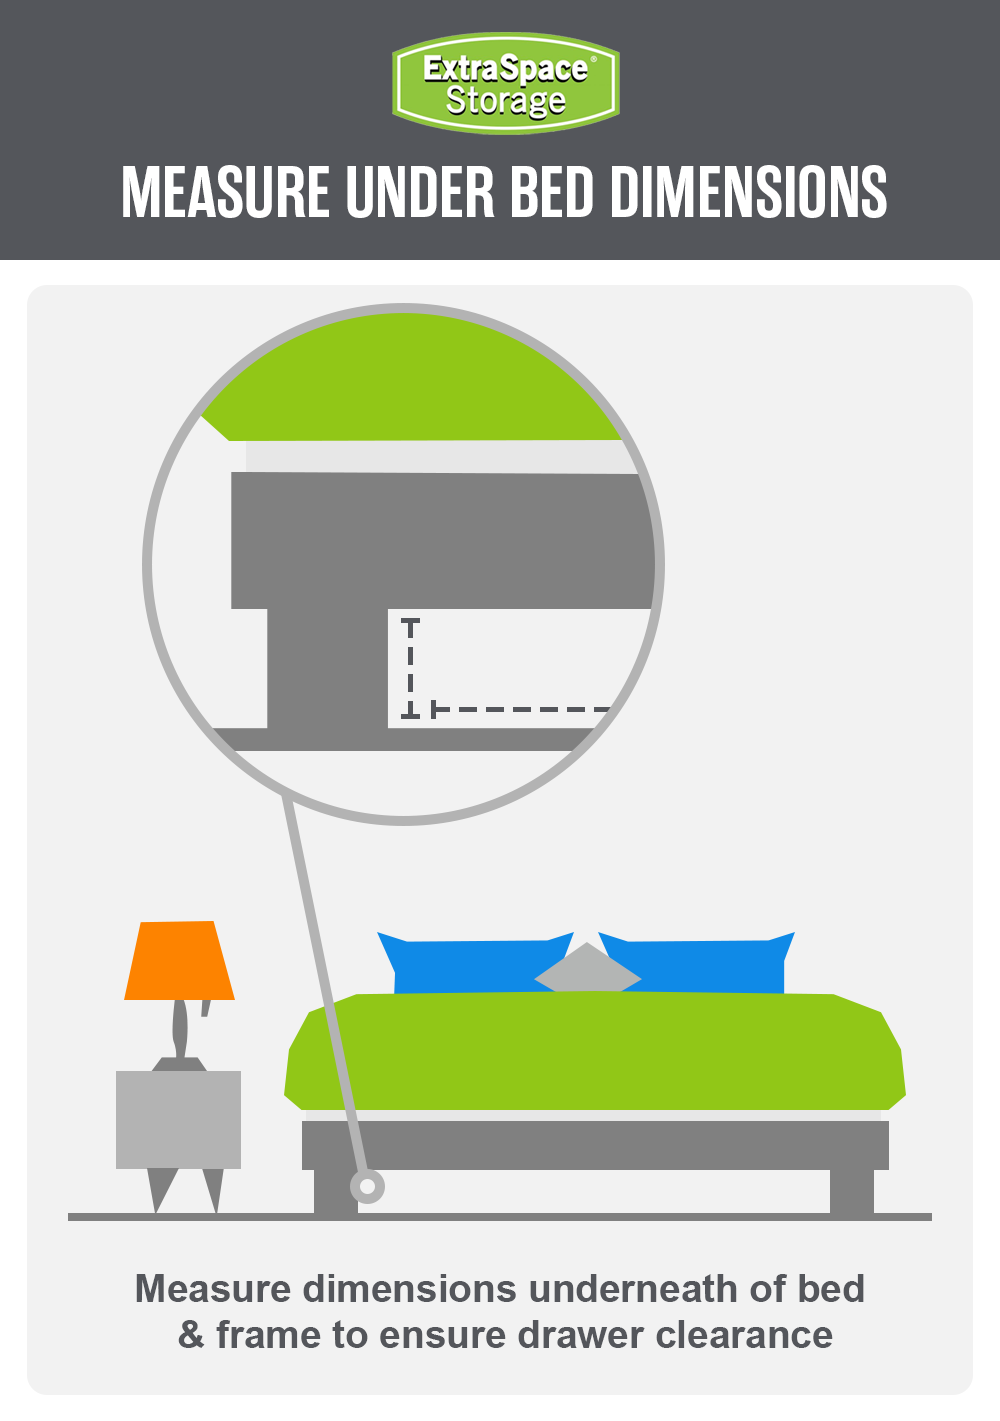 The first thing you need to do when building DIY under-bed drawers is to measure the space under your bed using a tape measure or ruler.
- Measure clearance from the floor to the bottom of the bed frame to ensure your DIY storage drawers with casters will fit, leaving space to prevent scraping.
- Measure the width between bed legs, factoring in obstacles like slats, beams, or a center rail.
- Account for the drawer handle to avoid tripping hazards.
- Determine drawer extension to prevent wall damage when pulled out.
Step 2: Plan Your Project
Gather your supplies and select a well-ventilated workspace—ideally outdoors—to minimize exposure to sawdust and fumes from paint or stain. If you’re working indoors, lay down a protective covering, like a tarp, to keep the area clean. Before moving forward with the project, take a moment to consider the following questions about your under-bed storage plans:
- Is the drawer (including the caster wheels) the right size for my space, or do I need to adjust the measurements to fit my needs/preferences?
- Do I have all the tools I need on hand, or do I need to borrow or buy new equipment?
- Do I want to make multiple drawers and adjust the materials list accordingly?
- Is my workspace big enough to complete this project safely?
- How long will this project take me to finish?
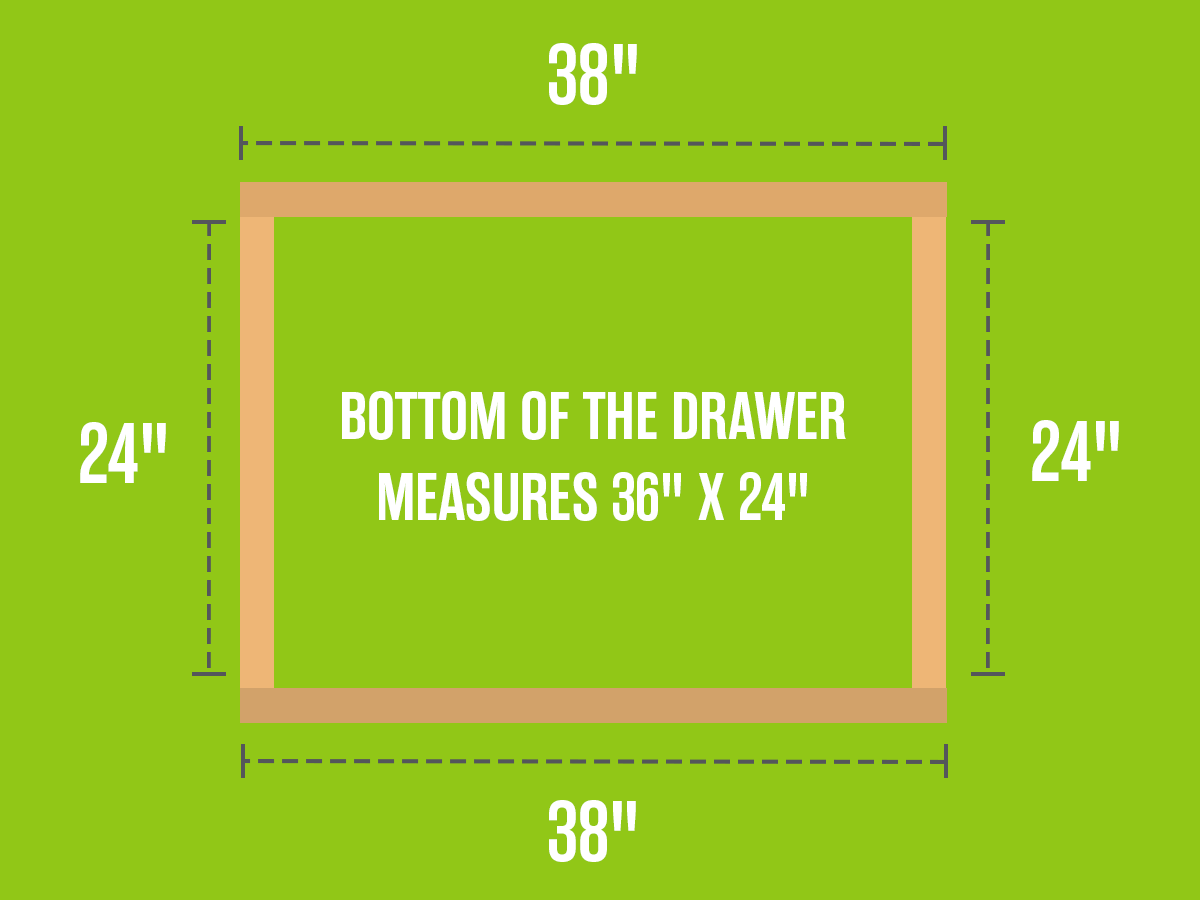
Step 3: Cut the Wood
Now that you know how much space you have to work with for your DIY under-bed storage drawer, you’ll need use your table saw to cut the wood for the project. Some wood-cutting safety tips to keep in mind include making sure the cutting area is clear and using safety glasses or goggles, hearing protection, and a mask to protect yourself from harm. Keep in mind that your custom project may require different cuts than those listed here.
- Cut 1″ off the ¾” x 2′ x 4′ piece of plywood so it measures ¾” x 2′ × 3′ (¾” x 24″ x 36″) for the bottom of the drawer.
- If you’re making a shorter drawer than ours, take the 1″ x 12″ x 12′ board and cut it to your desired width to reduce the drawer’s height.
- Cut the 1″ x 12″ x 12′ board into two lengths of 24″ and two lengths of 38″, leaving one scrap piece remaining. These boards will form the sides, front, and back of the drawer.
Step 4: Sand Your Wood Pieces
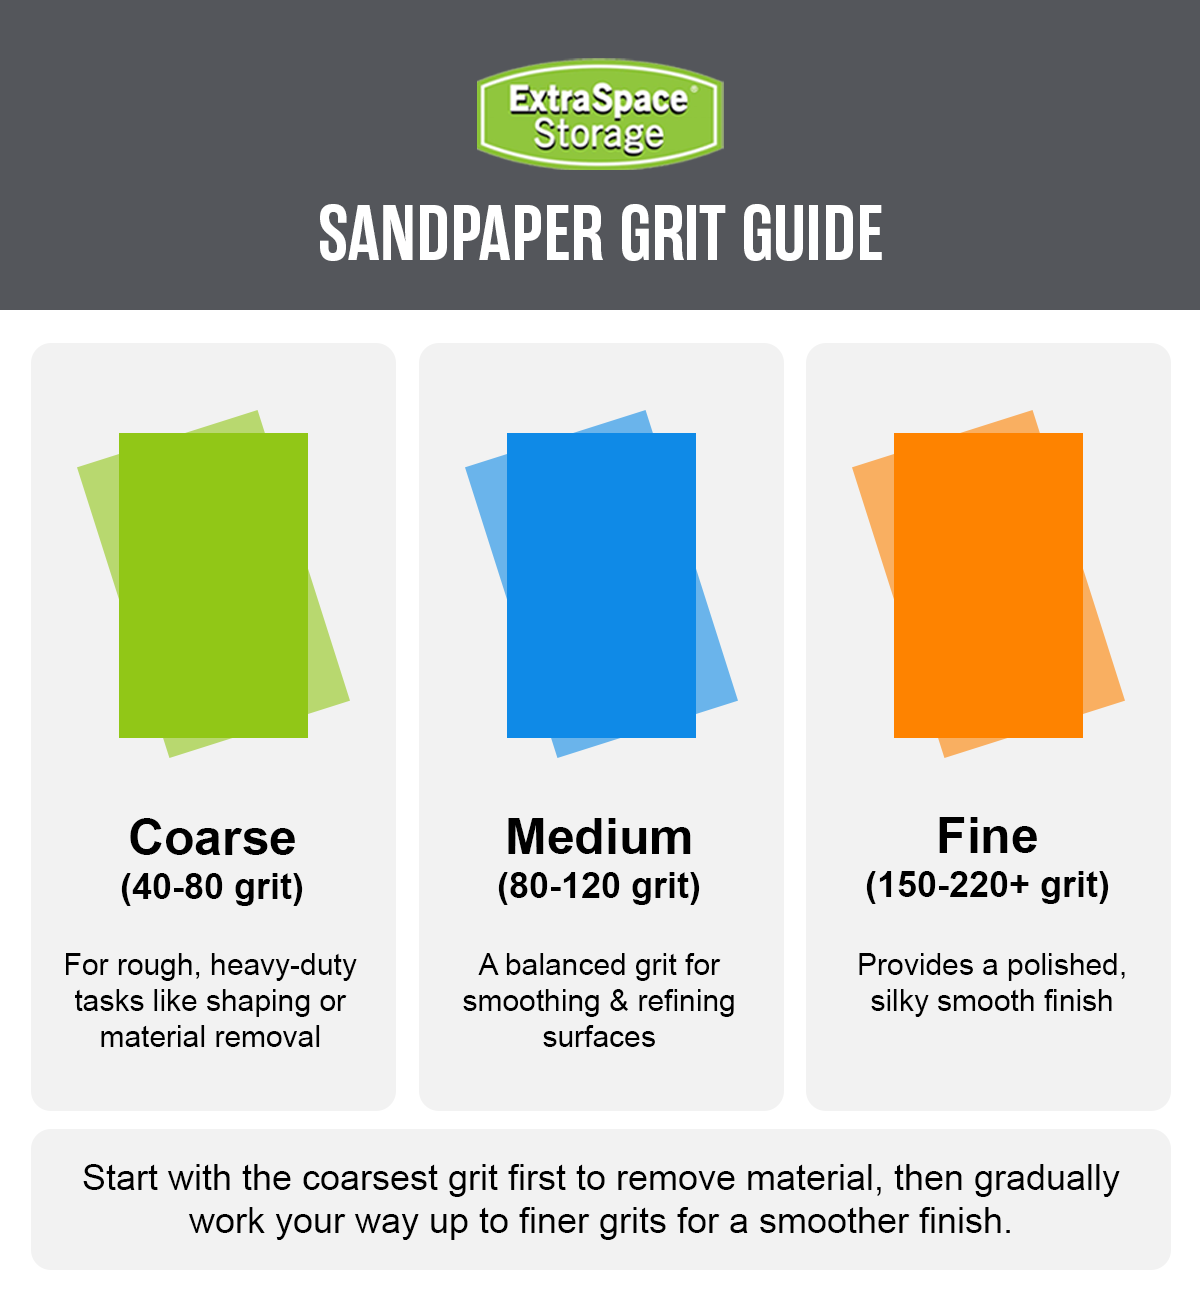 The next step for your under-bed storage containers is sanding the pieces to minimize rough edges on your wood boards. When sanding, you can choose between the precision of hand sanding and the speed of machine sanding. No matter which method you end up choosing, sanding will help elevate the look of your wooden drawer and make it easier for you to stain or paint it before you put it in your bedroom, a kids room, or guest room.
Step 5: Paint or Stain Your Storage Box
Now it’s time to paint or stain the pieces of your under-bed storage box! It’s generally easier to do this before assembling the drawer for smooth, even coats on all sides. Choose a mood-boosting paint color that complements your bedroom decor, or opt for stain. If staining, always wear gloves and a mask for protection from fumes. Use an old rag to apply the stain along the grain, wiping off any excess. Let the wood dry for 24-72 hours before applying a second coat or assembling your box. Depending on the type of paint or stain you use, you may also need to apply wood sealant for added protection for your project—some stains and paints already have sealant in their formula.
Step 6: Assemble Your Under-the-Bed Storage Box
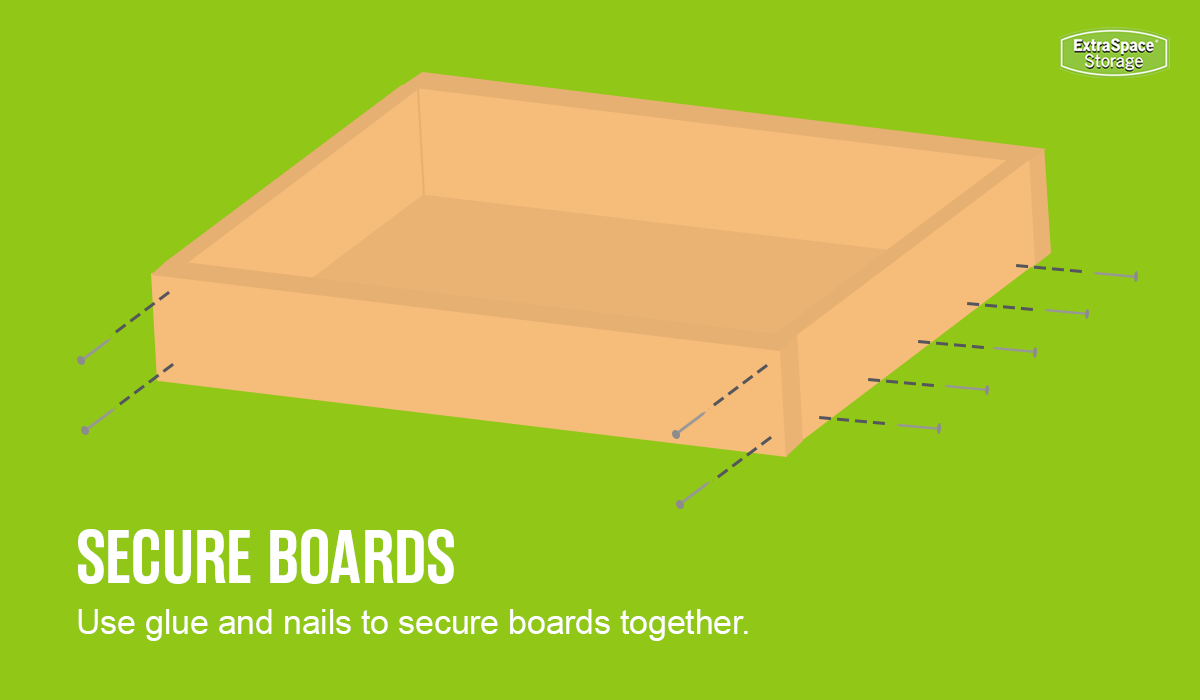
It’s time to assemble your under-the-bed storage DIY project! For extra strength, consider adding a small amount of wood glue along the edge of the plywood before nailing the sideboards into place.
- Use a nail gun to attach the two short sides of the drawer to the edge of the plywood—starting with a nail at each corner and adding nails every couple of inches along the entire edge.
- Repeat this process for the long sides, securing them to both the bottom of the drawer and the short sides.
- If you feel your box needs additional support, you can further secure the sides of the drawer with 1¼” or 1½” wood screws at their four corners. Pre-drill holes near the edges of the longer planks where they meet the shorter planks to prevent the wood from splitting. Then use your drill to drive the wood screws into each corner.
- If you intend to store heavier items like books, you might want to consider installing wood dowels to reinforce any weak joints.
Step 7: Attach the Casters & Handles
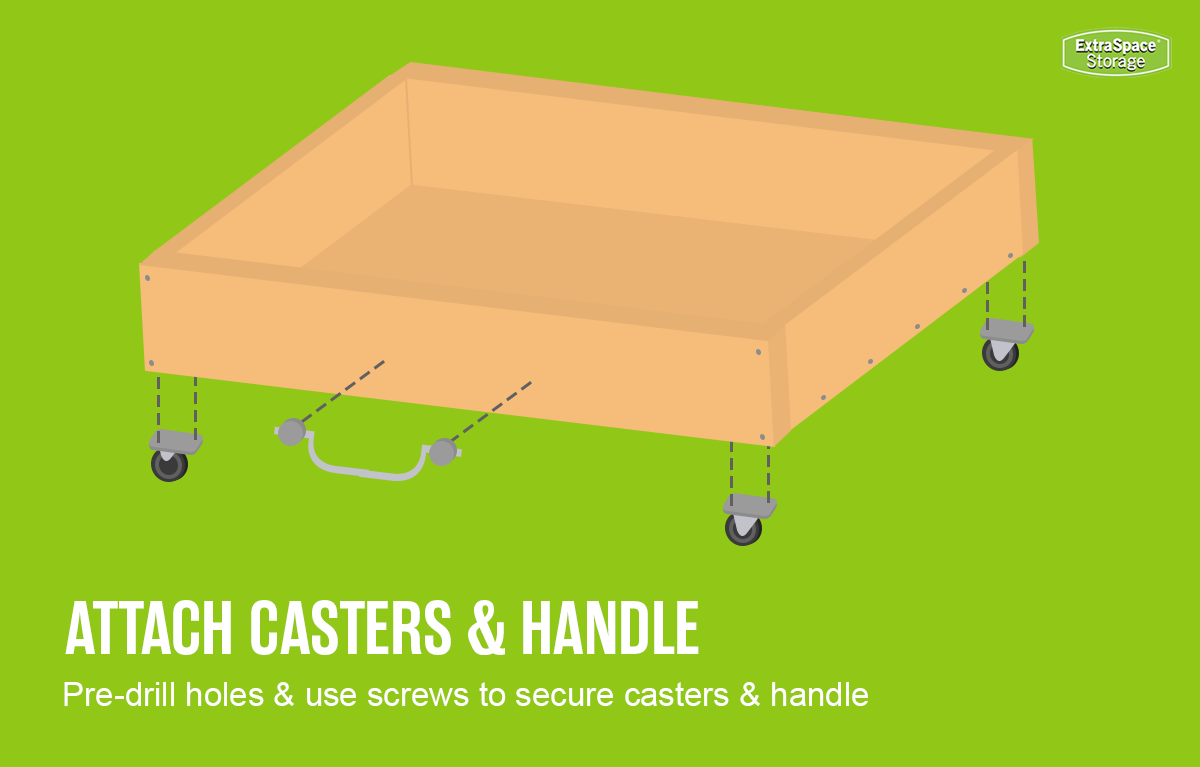
To make your DIY under-bed storage drawer easier for you to access, add a handle and swivel casters or fixed casters—depending on your preference! Casters will make it easier to maneuver the boxes around your floor and help prevent any potential scratches caused by the wood scraping against the ground.
- Use a pencil to mark the four corners of the drawer’s bottom for the casters, then pre-drill holes to prevent splitting.
- Check the length of your screws to make sure they won’t protrude through the bottom of the drawer (1/2″ to 5/8″ screws should be sufficient). Then, secure the casters using your drill and wood screws.
- Mark the handle placement on the front of the drawer using a level and a tape measure, then pre-drill holes.
- Align the handle with the pre-drilled holes and check the length of your screws (1¼” screws are likely ideal here). Insert the screws from the back, and carefully tighten them with a screwdriver to avoid over-tightening—which could damage the drawer or the handle.

Tips for Under-Bed Storage Organization
Now that you’ve assembled your under-bed drawer(s), maximize the space with a smart organization system. This will help you declutter your home and make it easier to find items when you need them. Here are some drawer organization ideas to try!
Define the Drawer’s Purpose
Decide what each drawer will hold—whether it’s seasonal items, extra bedding, or even under-bed rolling shoe storage. Assigning a specific purpose can help prevent the drawer from becoming cluttered with items that don’t belong. Additionally, group similar items together, like keeping seasonal clothing in one spot and linens in another. By organizing this way, you’ll spend less time rummaging for what you need.
Utilize Storage Containers & Dividers
To further organize your under-the-bed drawers, utilize dividers, baskets, storage caddies, compartment trays, or separator bins to keep like items grouped. These storage containers are also great for maintaining organization of smaller items like batteries, pens, art supplies, and more. Consider how often you’ll need certain items, placing containers with items you use less frequently toward the back and everyday essentials up front. If your needs change, simply rearrange the storage solutions for ease of access!
Label Your Drawers
Since your rolling under-bed storage isn’t see-through, labeling your drawers can help you identify what’s inside without having to open them—which is especially helpful if you made multiple drawers. When choosing labels, consider how changeable you want them to be. For a more permanent solution, consider painting on a decorative label. You can also find decorative adhesive labels for purchase. Another option is using removable adhesive strips to safely attach Velcro labels, allowing you to easily swap out the label. Note that adhesive labels can leave behind residue on wood or paint, so keep that in mind when deciding which approach is best for your needs.
Use Them for Overflow Storage
Live in a small space? Whether you’re in a small house or a studio apartment, you might not have dedicated storage spaces like an attic, basement, or garage to store things like holiday decor, sports and recreation equipment, or odds and ends. Your under-bed storage drawers are the perfect hidden storage solution for these belongings! By storing items like bedding, bath linens, wrapping paper, seasonal decor, and more in your DIY bedroom storage containers, you can keep these items tucked out of sight when they’re not in use—freeing up space in other parts of your home.
Maximize Space for Clothes
If you’re using your drawers for clothes, fold them in a way that maximizes under-bed storage space. Folding clothes with the KonMari method (also known as file folding) allows clothes to stand upright—making it easier to see and access each item without digging through a pile. You can also roll your clothes to save space. If your dresser or closet has room for everyday clothing, reserve under-bed storage for hand-me-down items or seasonal items like heavy sweaters or swimsuits to help declutter and organize your closet. For long-term storage of clothes or linens, consider vacuum-sealing to protect against dust and pests. Just be sure to air out vacuumed-sealed bags every six months to prevent wrinkles or creases.
***
Need somewhere to store items while building your under-bed storage? Extra Space Storage has storage facilities across the country to help keep your home clutter-free! Find self storage near you.


