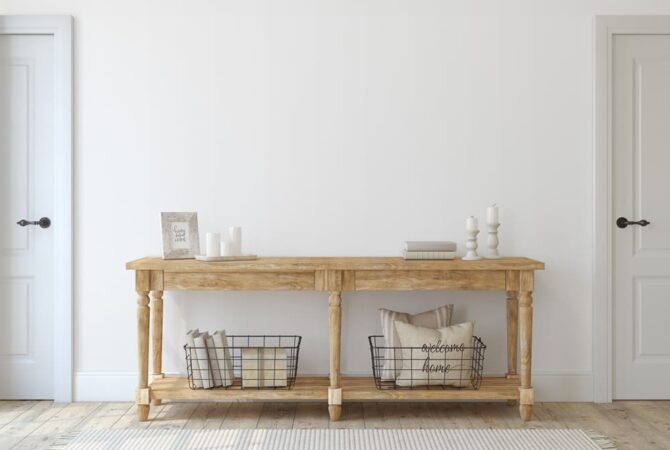
As a thin, long side table that can be used for many purposes, console tables can function as an entryway table, living room TV stand, and more. Opting to build your own wooden console table can not only save you money, but also allow you to customize it and fit your style and space perfectly. Here’s a step-by-step breakdown of how to build a console table for your home!
Supplies Needed:
The following materials listed will create one console table measuring 48″ long x 16″ wide x 34.5″ tall. We encourage you to adjust these lists as needed to create your desired console table size.
Material dimensions are written as Thickness x Width x Length—please note we use nominal sizes, rather than actual lumber sizes.
- 8′ 2x4 boards (x7)
- 8′ 1x2 board (x1)
- 2.5″ premium trim screws (1 box)
- 3.5″ flathead fastener screws (1 box)
- Bar clamps
- Drill
- Drill bit for pilot holes
- Gloves
- Miter saw (or circular saw)
- Paintbrush
- Pencil
- Polyurethane
- Rags
- Safety goggles
- Sander/sandpaper
- Stain
- Tape measure
- Trim screw bit
- Wood conditioner
Cut List:
- 48″ 2x4 (x4) – tabletop
- 47″ 2x4 (x6) – middle & bottom shelves
- 32.5″ 2x4 (x4) – table legs
- 10.5″ 1x2 (x6) – brace pieces
Use caution when using power tools. Follow all manufacturer’s instructions and wear proper safety gear. There will be scrap wood left over from some of these cuts.
Step-by-Step Instructions for a DIY Console Table
Whether it’s your first time making furniture by hand or you’re an experienced DIYer, these eight steps will help you build a rustic DIY console table that levels up your space!
Step 1: Plan Your Project
Before you start constructing this DIY table, figure out where your workspace will be, gather all necessary materials, and determine whether you need to make any modifications to the process to better fit your space, style preferences, and needs. Ask yourself the following questions to ensure you’re ready to begin:
- Is this console table the right size for my space? If not, do I need to adjust the measurements to make it bigger or smaller?
- Do I have all the tools I need on hand, or do I need to borrow or buy new equipment?
- Should I adjust the cut or material list to customize the table to my preferences?
- Is my workspace big enough to do this project safely?
- How long will this project take me to finish?
Step 2: Cut the Wood
Once you’re ready to start cutting your wood, put on safety goggles and gloves for your protection. To help ensure accuracy, always mark with a pencil where each piece of wood needs to be cut—and verify you measured correctly again—before using your saw. Cut the wood for your console table using the following directions:
- Grab the two best-looking 2x4 boards for your table top, then cut them in half—you’ll end up with four 48″ pieces. Set aside.
- Create the middle and bottom shelves by cutting three new 2x4s into six 47″ pieces. Set aside.
- Take two new 2x4s and cut them into four 32.5″ pieces; these will be your console table legs.
- Cut the 1x2 into six 10.5″ pieces—these will serve as the brace pieces.
Step 3: Sand, Stain, & Finish the Wood
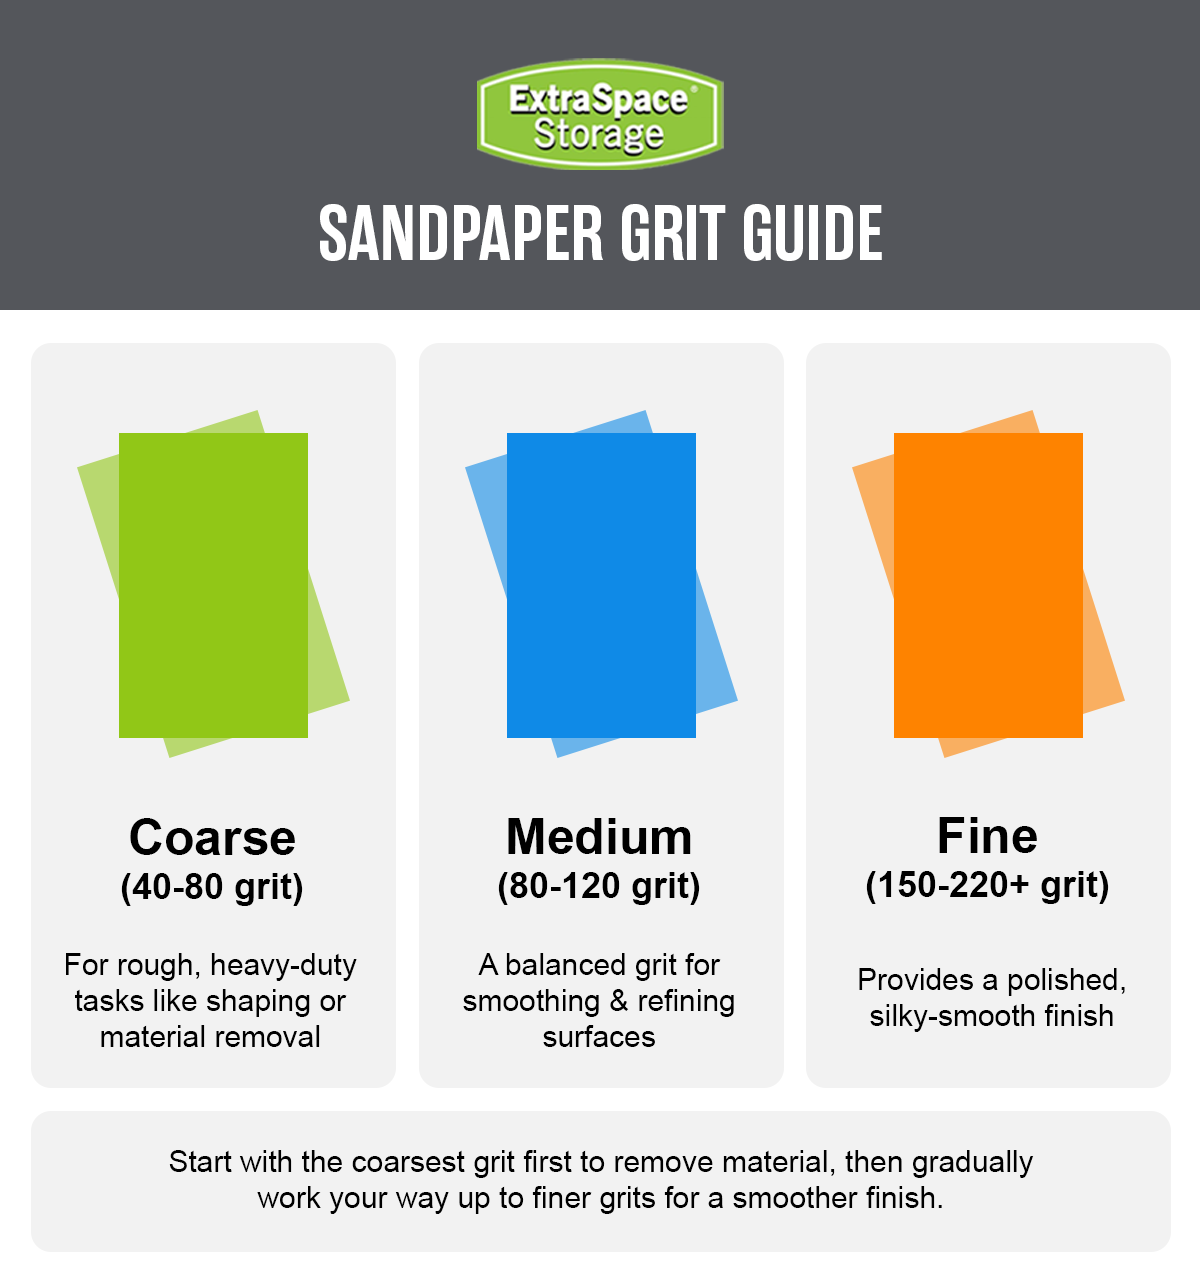
After cutting all your wood to size, sand each piece down as needed, vacuum up dust on each piece of lumber and your workspace before applying a wood conditioner to create an even, smooth surface for stain application. Test your stain on a scrap piece of wood to see how many coats you prefer—the more coats, the darker the stain. Wondering how to stain wood? Using a clean rag or brush to apply thin, even coats for a clean-looking finish. Between coats, remove any excess stain with a clean rag to ensure an even application. Once stained to your desired color, brush two coats of polyurethane on top of everything to help seal it and protect the wood.
Step 4: Assemble the Tabletop
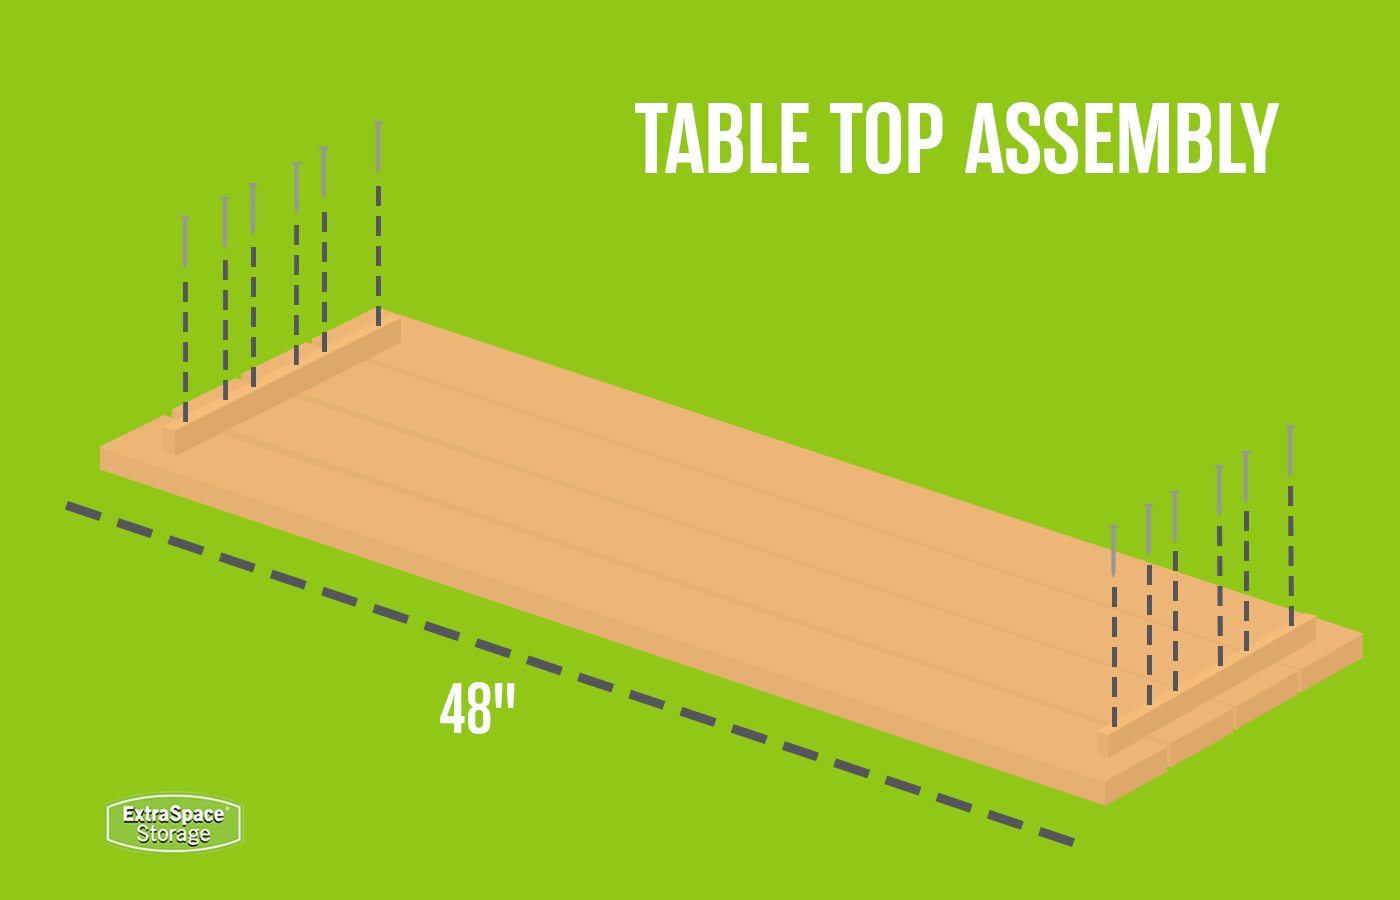
Now that everything is smooth and stained, you can move on to construction! Follow these directions to build your console tabletop:
- Line up the four 48″ 2x4s with the good side facing down on the ground. Ensure the edges are even with each other.
- Glue the sides of the boards together to create the tabletop. Clamp to keep the piece secure while the glue sets.
- Place two of the 10.5″ 1x2s flat on both ends of the tabletop, 0.5″ in from the edge and 1.5″ in from the front and back. (This placement location must be accurate so as to ensure space to attach the 2x4 legs later. )
- Pre-drill six pilot holes* into each 1x2. The outer 2x4s have room for one hole each, while the two inner 2x4s should have two holes each for stability.
- Then drill 2.5″ trim screws into the pilot holes to anchor the 1x2 bracers to the 2x4s.
*Drilling pilot holes will help prevent the wood from splitting when you drill in your screws.
Step 5: Assemble the Middle & Bottom Shelves
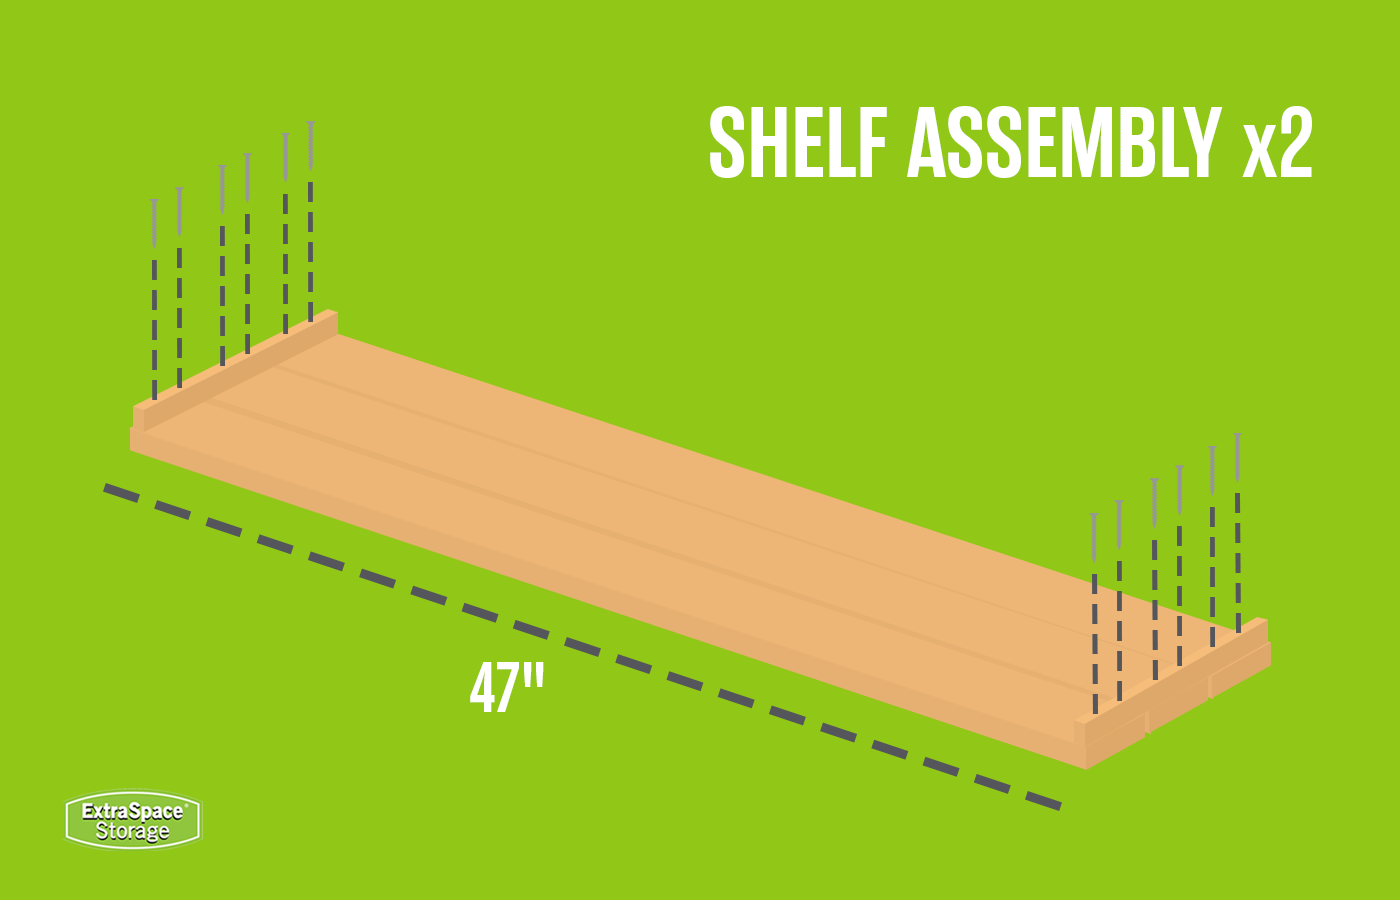
With the tabletop complete, you’re ready to begin assembling the middle and bottom shelves. To create the middle shelf of your console table, follow these directions:
- Lay three 47″ 2x4s flat on the ground with the good side facing down.
- Glue the sides of the boards together to create the middle shelf. Clamp to keep the piece secure while the glue sets.
- Place two 10.5″ 1x2s on each side, flush with each edge/side and 1.5 inches in from the front and back of the 2x4s.
- Pre-drill six pilot holes into each 1x2 (two holes on each 2x4). Then drill 2.5″ trim screws into the pilot holes to anchor the 1x2s to the 2x4s.
- Repeat this exact same process to create the bottom shelf.
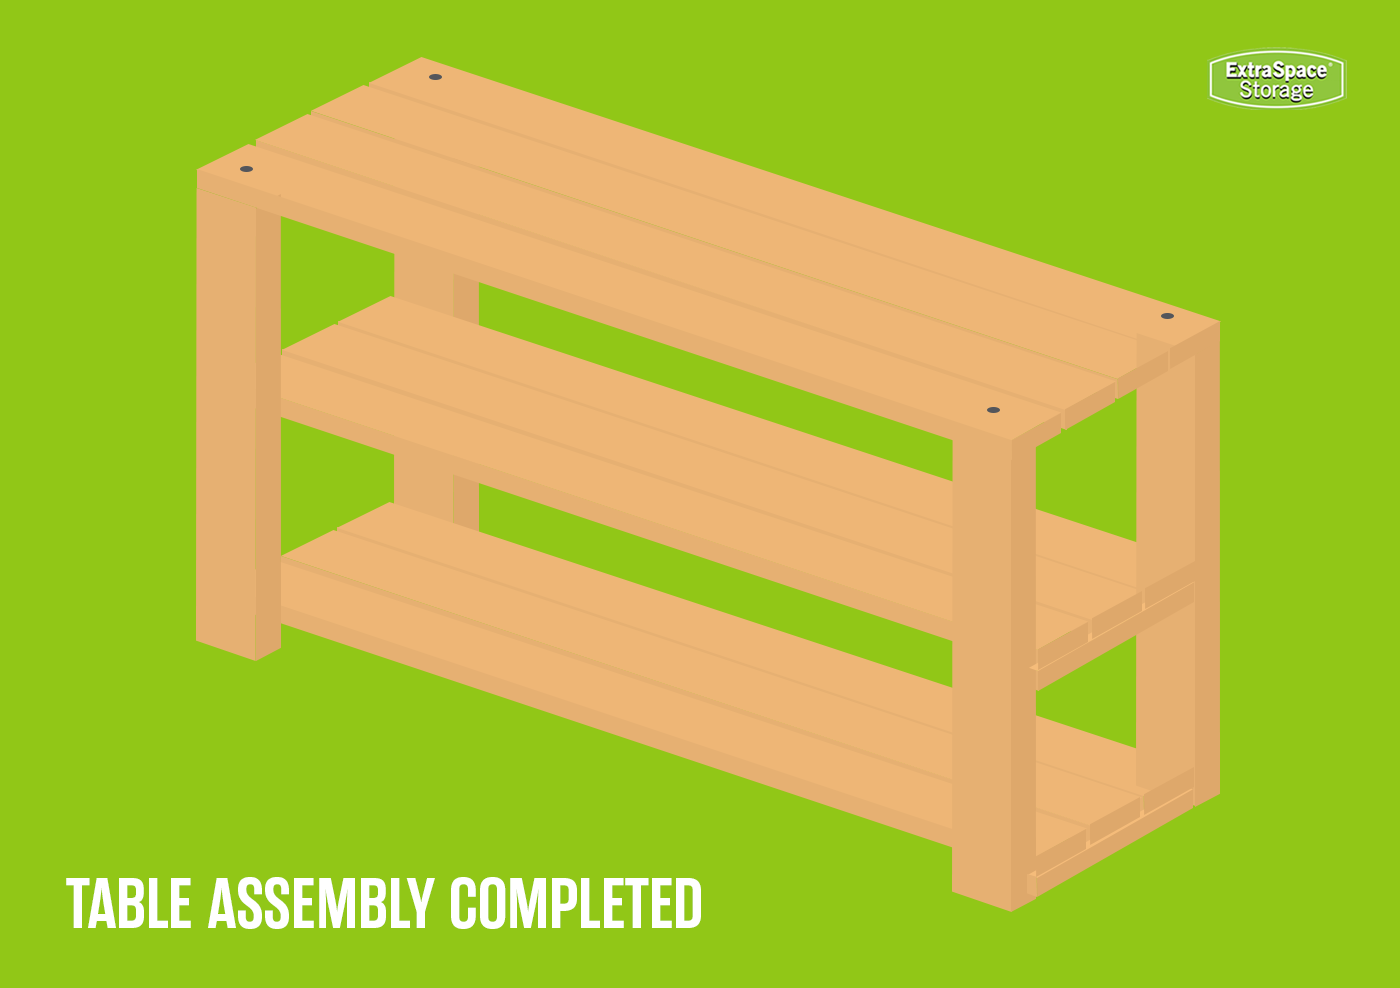
Step 6: Attach the Legs to the Tabletop
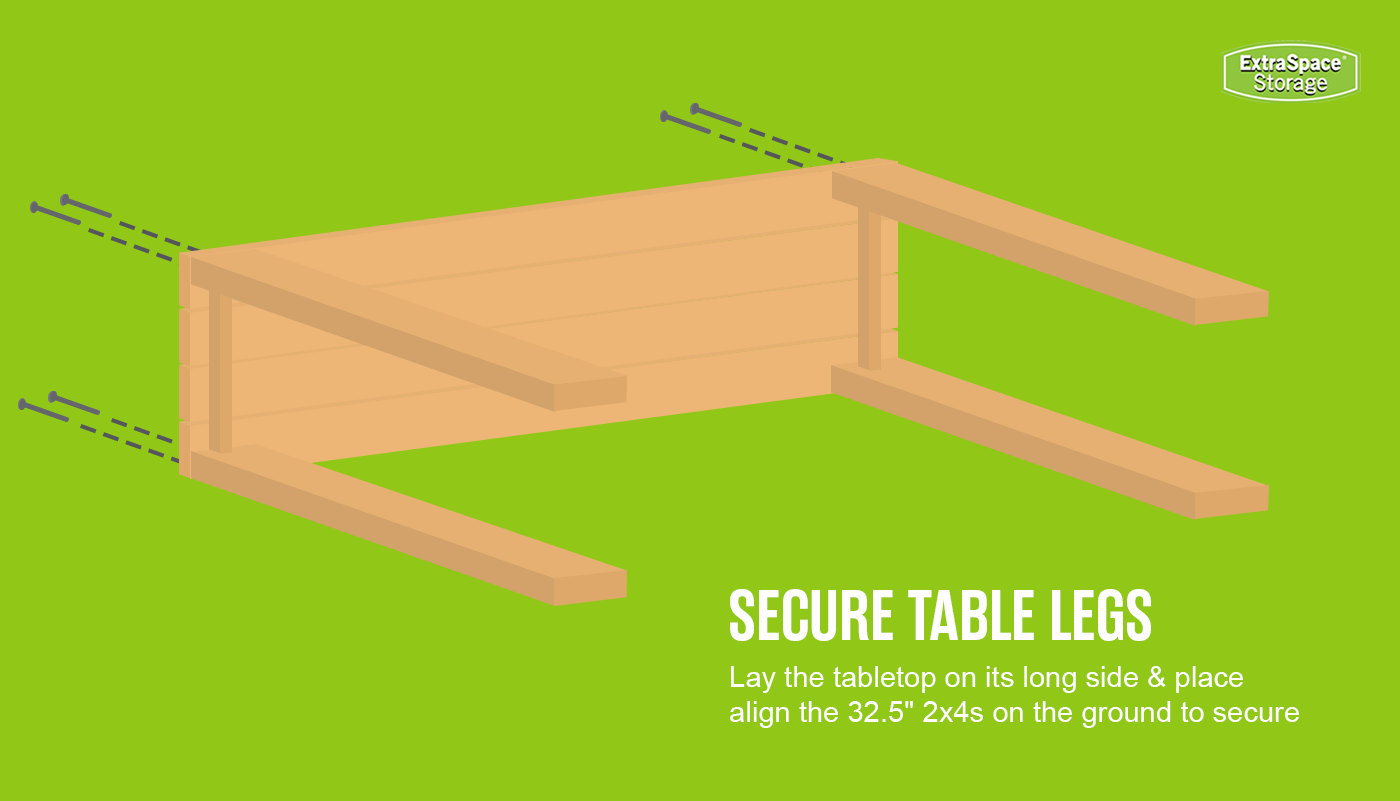
Lay the tabletop on its long side (i.e., upright at a 90° angle with the ground) and place two of the 32.5″ 2x4s flat on the ground with the good side facing down. Here’s how to secure the legs to your console table:
- Slide one of the leg pieces to the bottom left corner of the tabletop so it sits between the edge of the tabletop and the end of the 1x2 brace piece.
- Pre-drill two pilot holes into the tabletop where it meets the 2x4 leg.
- Drill two 3.5″ flathead fastener screws into the the pilot holes to anchor the leg to the tabletop.
- Repeat this process on the bottom right corner.
- After these two legs are attached, flip the table over and repeat to attach the remaining two leg pieces.
Step 7: Attach the Middle Shelf
To determine where to attach the middle shelf, stand the table upright on its legs. Measure 15.5″ down from the top of the tabletop, and mark the inside of all four legs with a pencil—this is where the top of your middle shelf will start. To attach the middle shelf, follow these instructions:
- Lay the tabletop and legs back down on its long side (i.e., upright at a 90-degree angle with the ground).
- With the good side facing the bottom of the tabletop, slide the middle shelf up to the 15.5″ mark. It should be flush with the outside of all four legs.
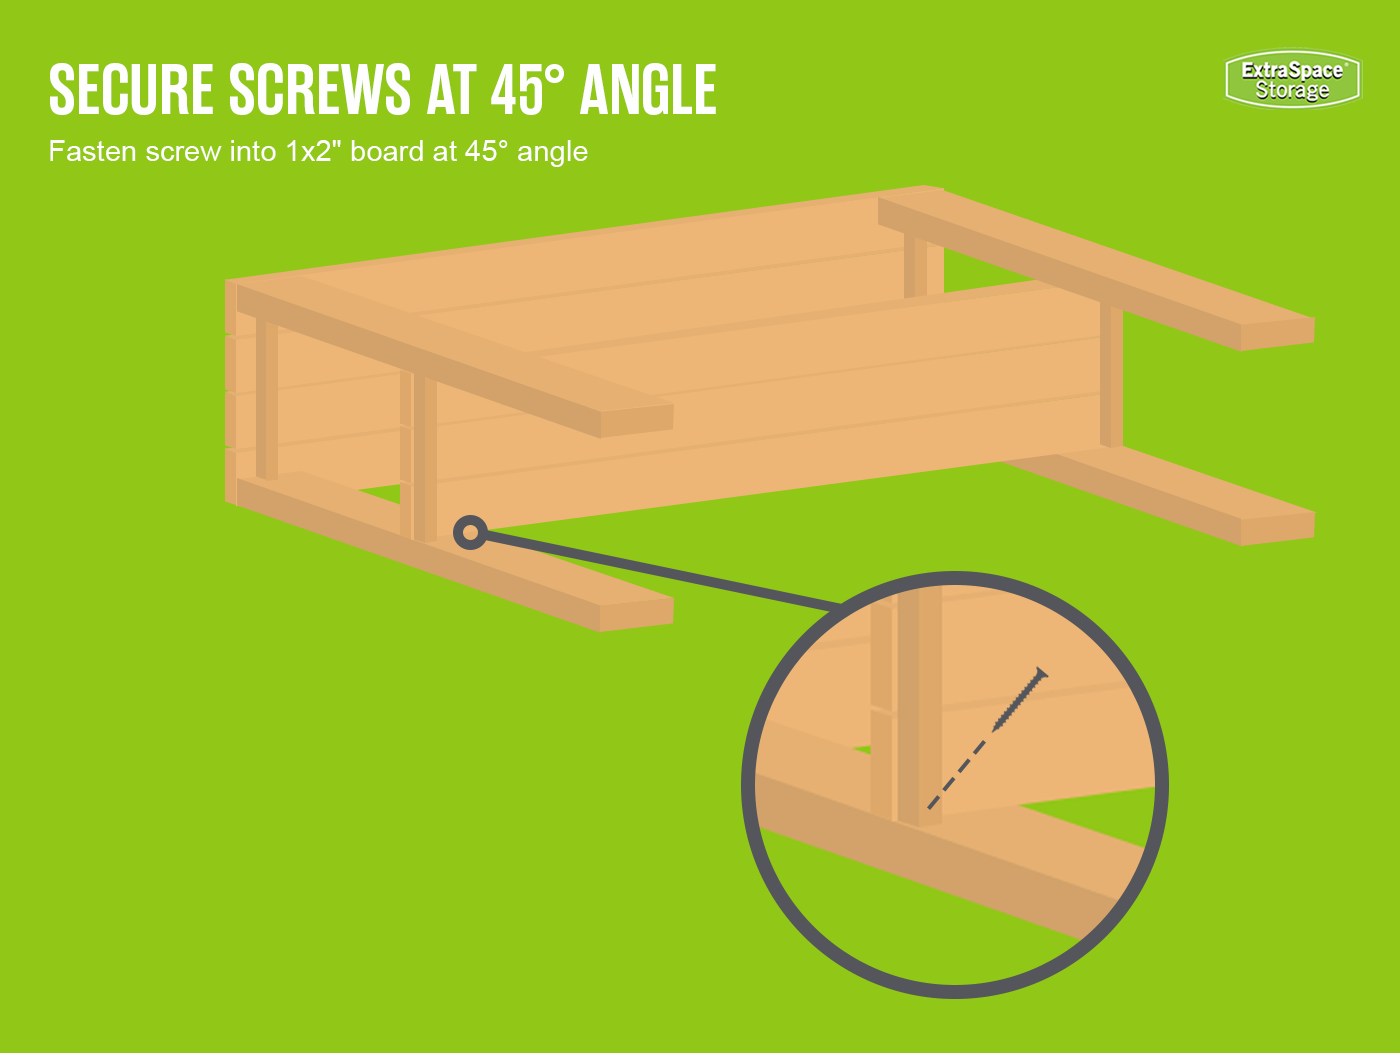
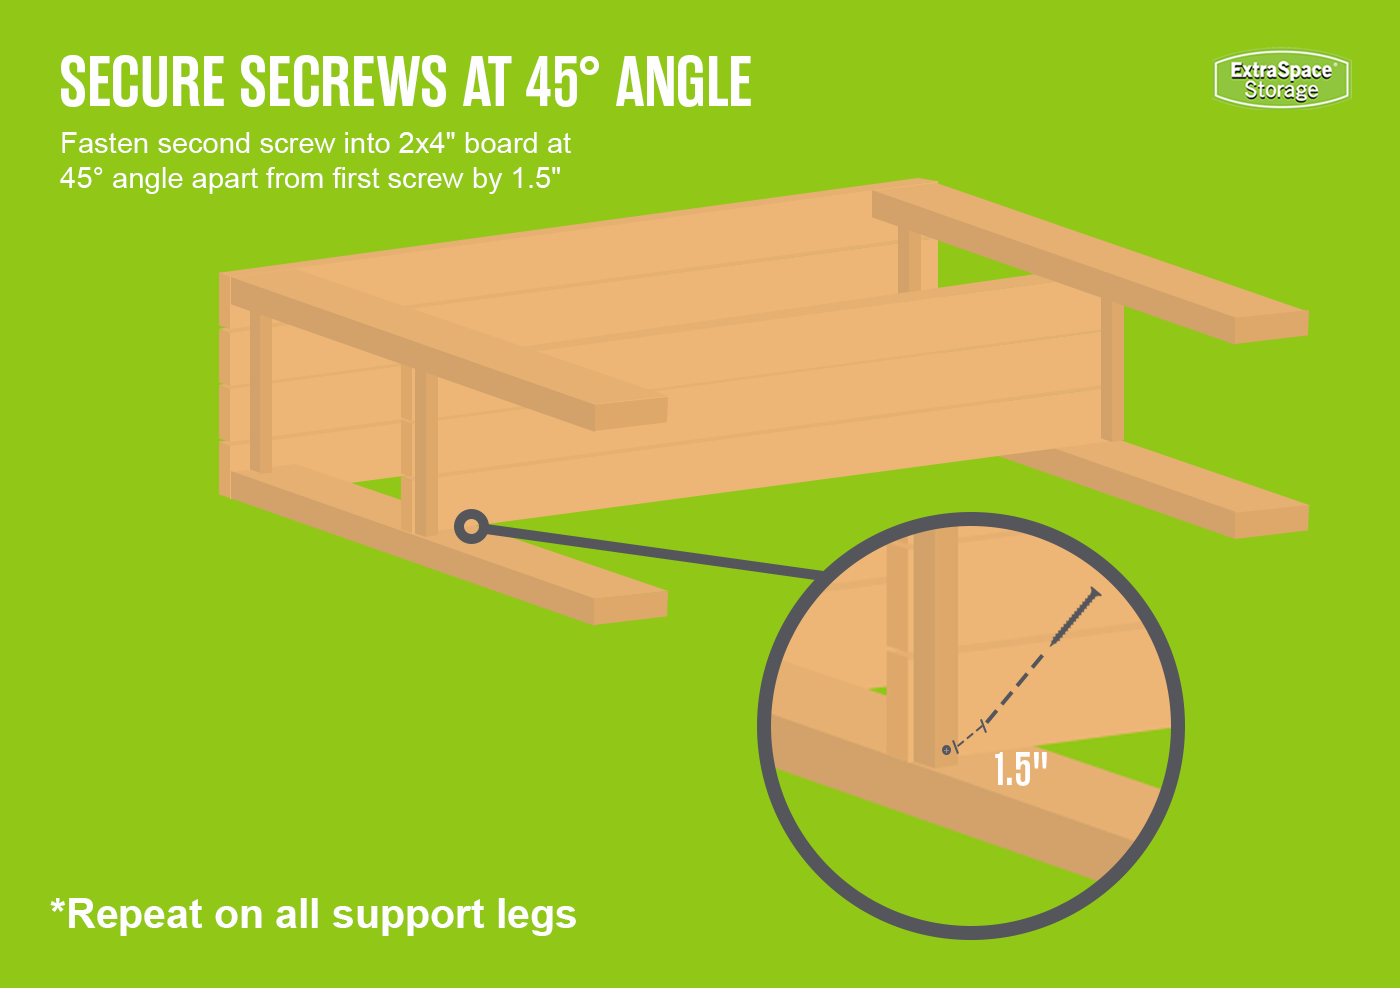
- Pre-drill a pilot hole into one of the shelf’s 1x2s at a 45-degree angle, 1.5″ in from where it meets the leg.
- Drill a 2.5″ trim screw into the pilot hole to anchor the 1x2 to the 2x4 leg.
- Repeat this process 1.5″ in from the leg on the middle shelf’s 2x4 for additional support. Take this slow so the screw doesn’t go through the outside.
- Repeat this process on the other side, then flip the table over to attach the other two legs.
Step 8: Attach the Bottom Shelf
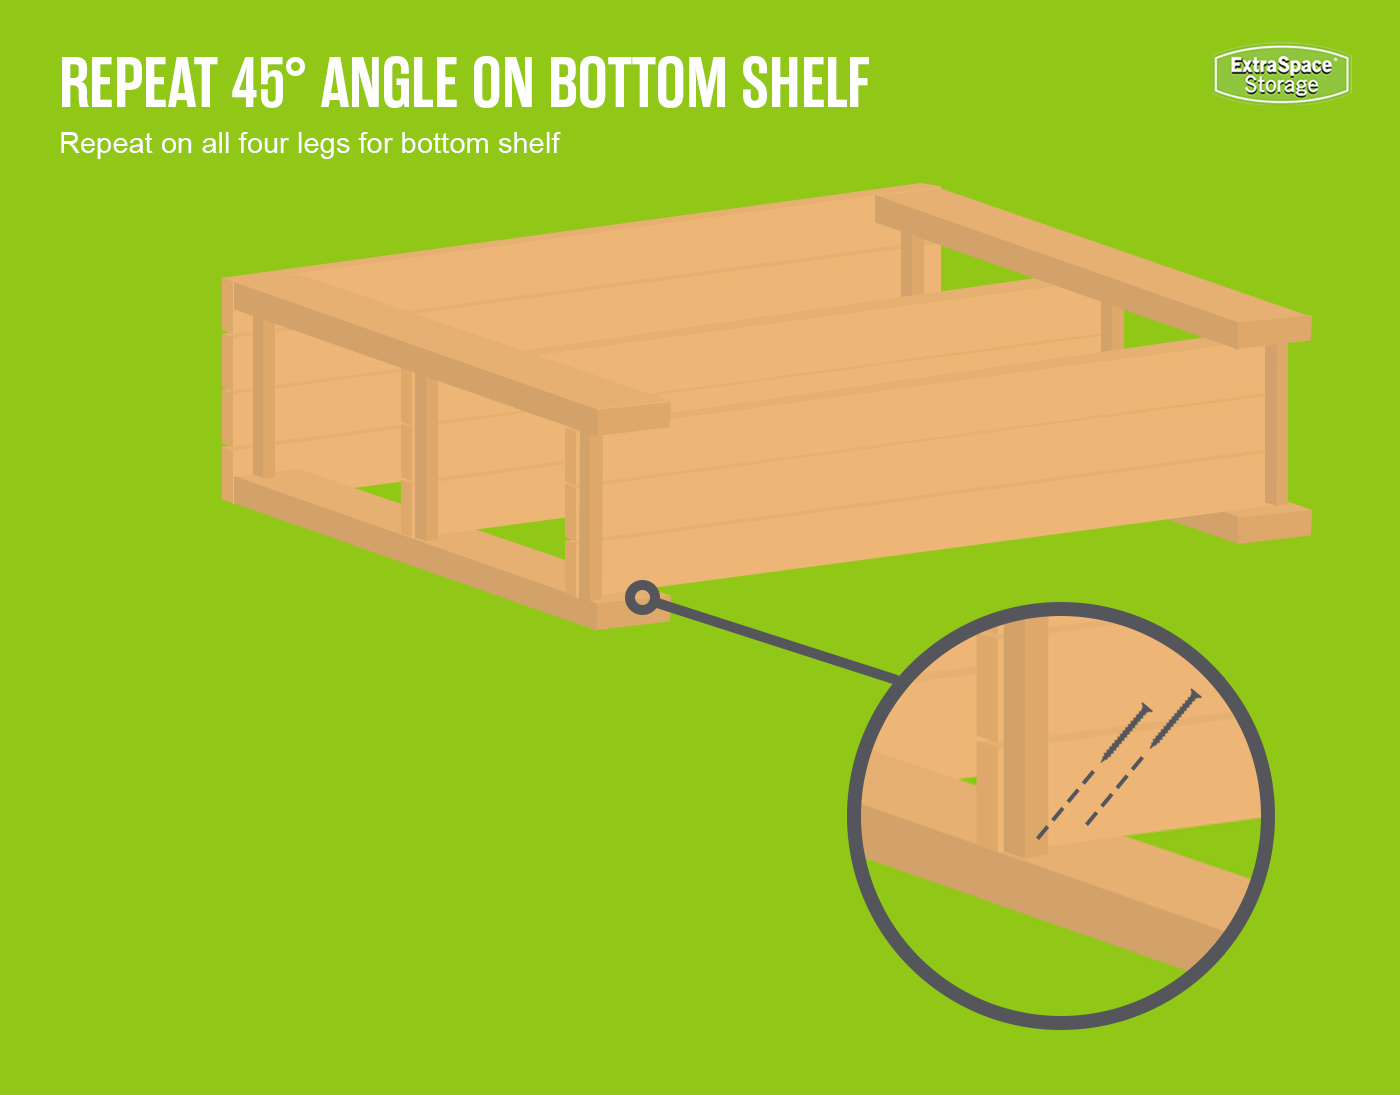
To attach the final shelf, measure 15.5″ down from the top of the middle shelf, and mark the inside of all four legs with a pencil—this is where the top of your bottom shelf will start. With the good side facing up and the bracer-side facing down, slide the bottom shelf up to the 15.5″ mark. After ensuring the bracers are flush with the bottom of all four table legs, use the exact same process described in Step 7 to attach the bottom shelf to the console table’s legs.
Decor Tips for Your DIY Console Table
Need some inspiration on how to dress up your console table? Check out these console table decor ideas fit for a variety of home decorating styles!
Place Your Table Under a Mirror
A great way to style your console table is to hang a mirror above it—especially if you’re planning to use it as a DIY entryway table! Whether your table is placed near the front door or against another wall in your home, a mirror can open up the space and add to your overall decor. If it’s by the entryway, it’s also useful for checking your appearance when coming and going. Opt for a minimalist look by hanging a simple, rounded mirror on the wall. Or draw more attention to the space by opting for a vintage statement mirror!
Play Around with Lighting
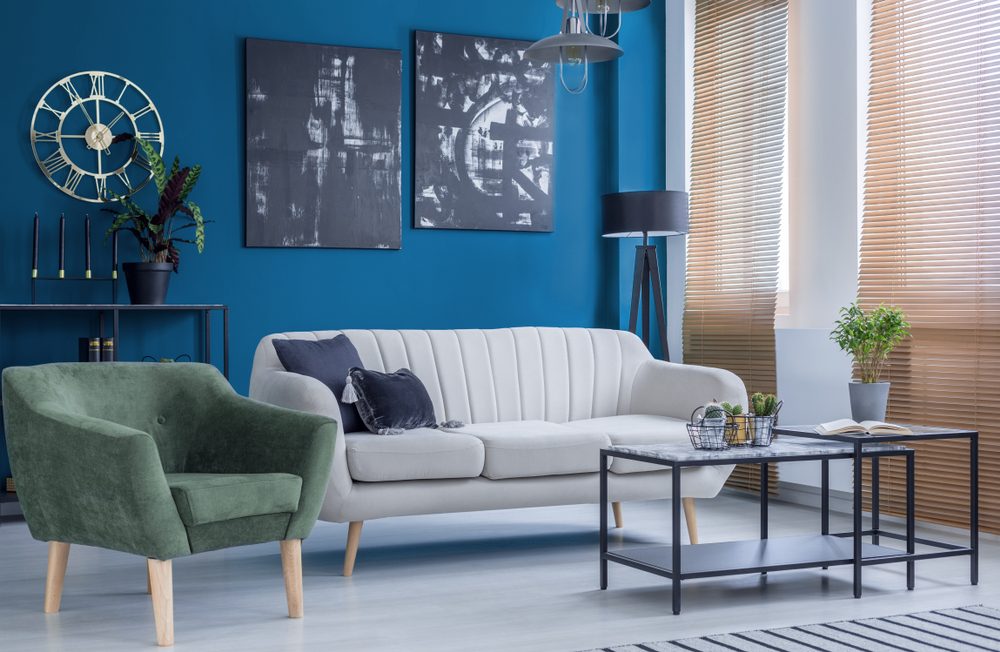
No matter where you end up placing the table in your house, one of the best console table ideas is to incorporate lighting! Candles and lamps are not only great styling pieces, but they can also introduce relaxing, ambient lighting to your space. Create a cozy, hygge feel by adding a warm-toned lamp or some candles on top of your console table. Spread out taper candles of varying heights to add visual interest. Or place a lamp on each end if you prefer a more symmetrical look!
Display Artwork & Antiques
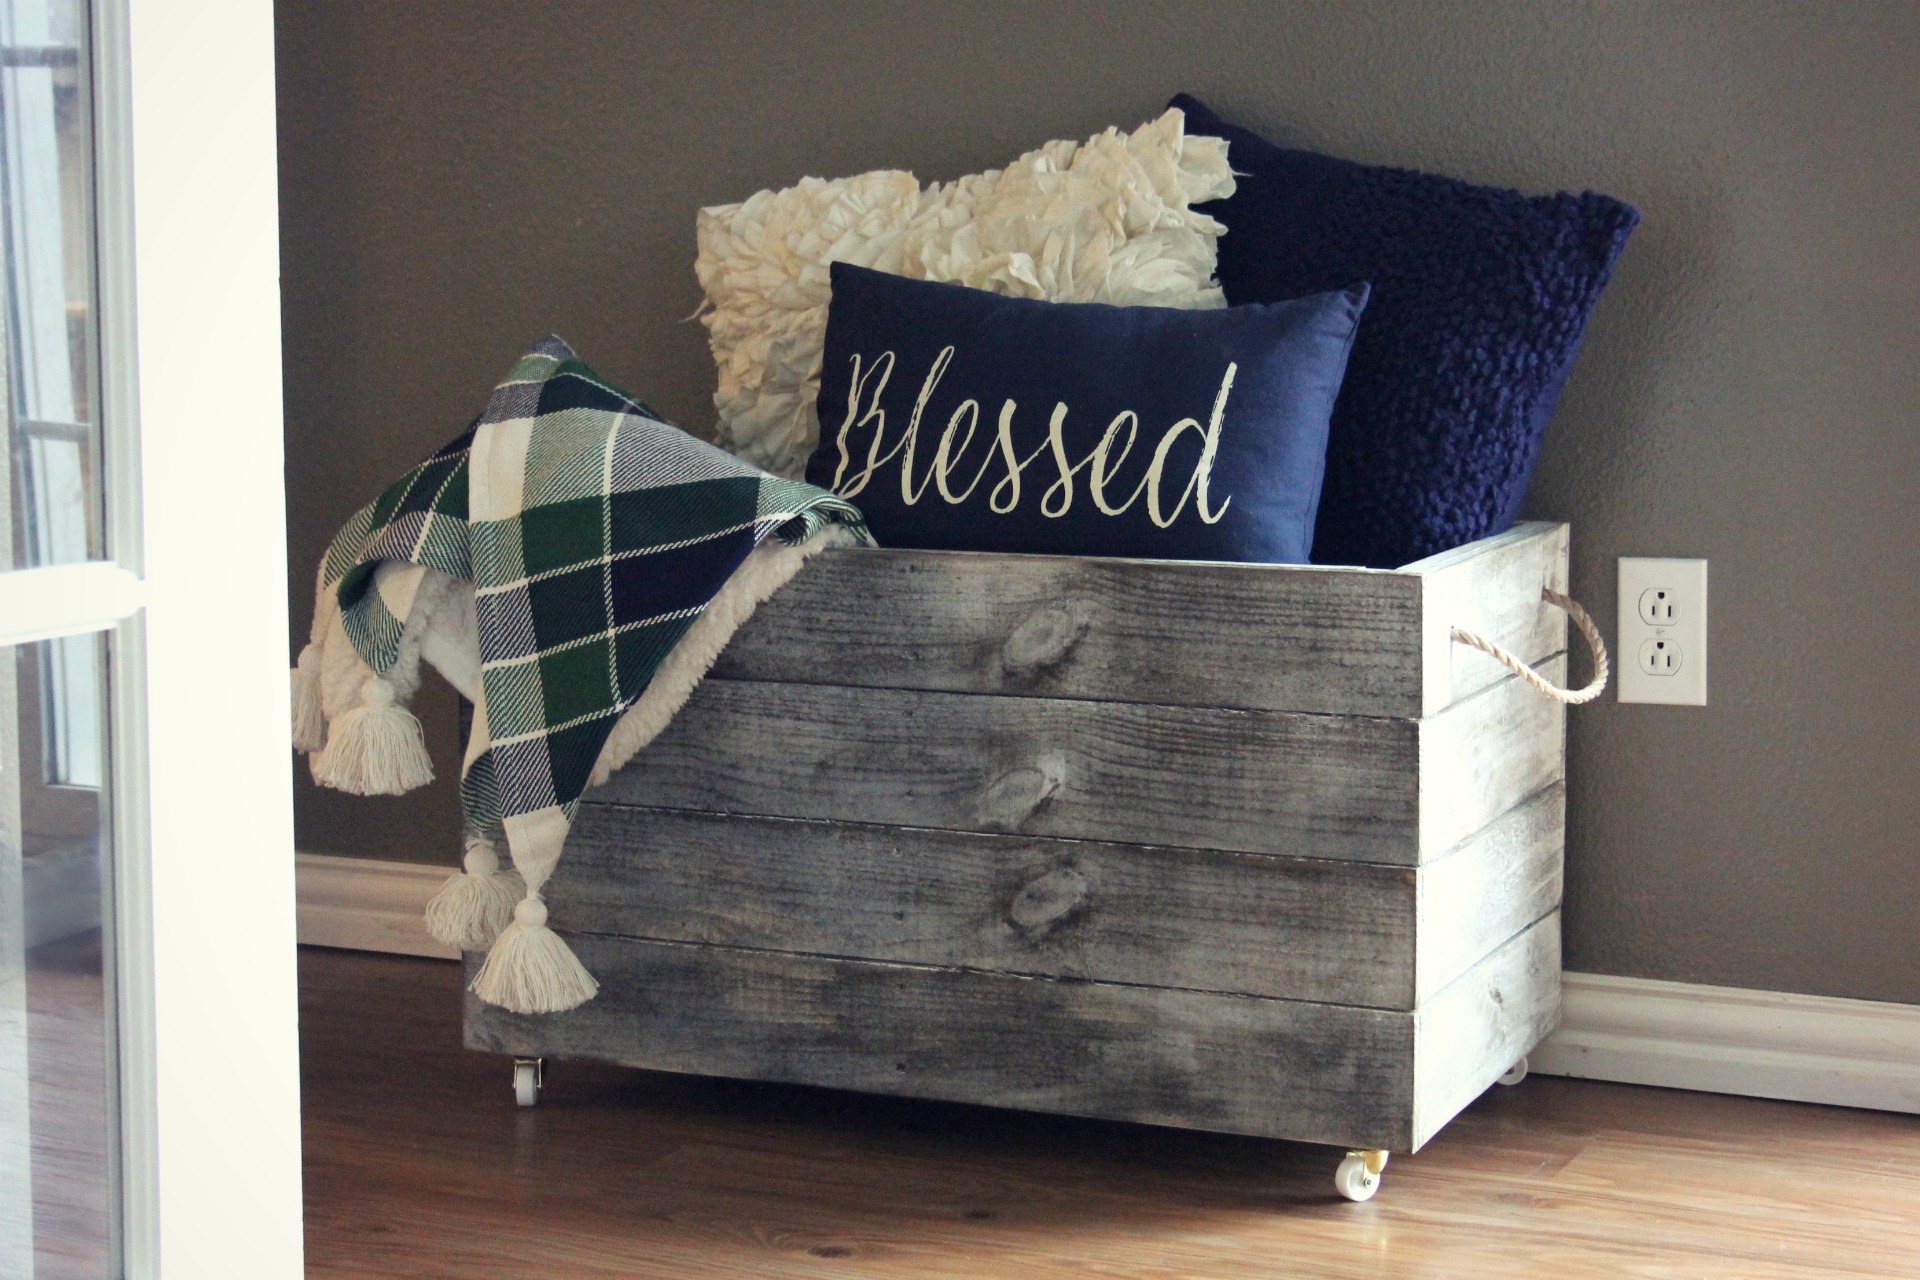
With so much shelf and table space, your DIY rustic console table is the ideal place to put your favorite pieces of art on display! From sculptures to framed paintings, the opportunities are endless. If you’re more of a maximalist, consider adding some knick-knacks to the shelves to complement larger statement pieces—or proudly tease some of your bookshelf wealth. Or use your table to show off antique photos, earth-toned pots, and other vintage items for a farmhouse console table.
Consider Functional Decor
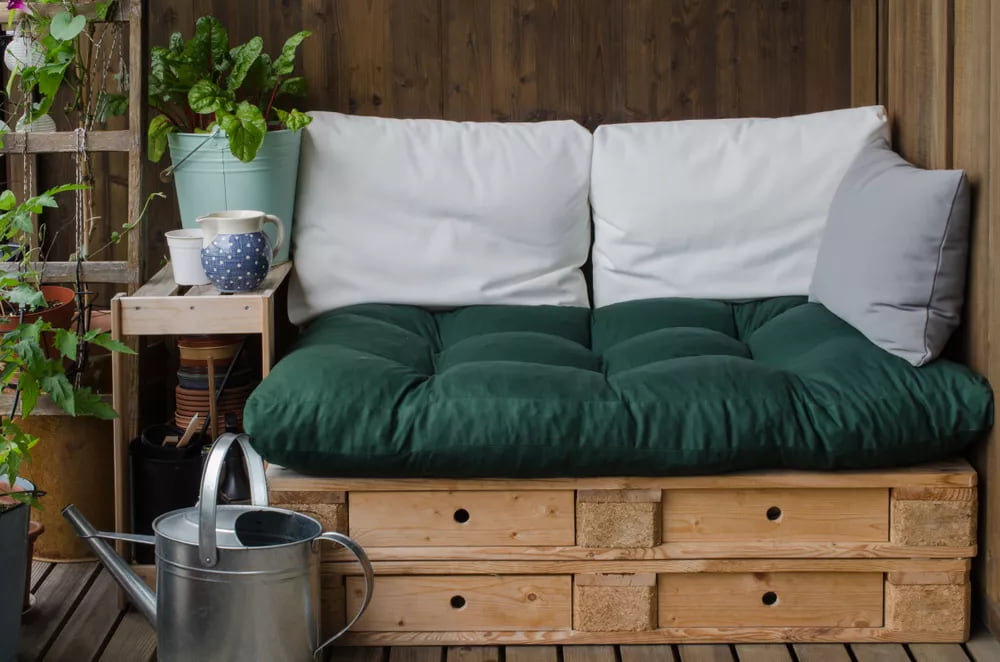
To maximize room in your home, try decorating your table with pieces that also help with organization and storage! Including storage baskets under your console table is a great hidden living room storage idea for storing blankets, pillows, and other odds-and-ends out of the way. If you have room for the table in your kitchen, turn it into a DIY coffee bar to hold your coffee maker, mugs, and more. You can even consider installing DIY shelves above your table to bring it all together!
***
Need more space at home to build DIY furniture? Extra Space Storage proudly offers short-term storage while you tackle your home improvement projects. Find monthly storage near you today!